Your Twitch Panel Template Guide: Tutorial, Sizes & Editable Designs

If you’re serious about streaming on Twitch, your channel’s visuals matter as much as your content. And while banners and overlays get most of the attention, it’s your Twitch panels—those small, clickable graphics under your “About” section—that quietly do the heavy lifting. They tell viewers who you are, when you’re live, and where to find you beyond Twitch.
A well-designed Twitch panel template helps your channel look organized, professional, and on-brand. Whether you want to show your schedule, link to your socials, or write a short “About Me” section, panels make your page easier to explore and more memorable.
In this guide, you’ll learn everything you need to create your own Twitch panel layout, from recommended sizes and design specs to content ideas and editable design options inside MediaModifier. Plus, we’ll show how to align your panels with your Twitch banner design for a cohesive look, without confusing the two.
What is a Twitch panel? (and how panels differ from banners)
A Twitch panel is a small graphic block that appears in the About section of your Twitch channel. Panels are where streamers introduce themselves, share schedules, link to social media, and highlight donation or subscription options.
In short: they’re the “info hub” of your Twitch profile—clean, structured, and easy for viewers to scan.
Each panel can include an image (your design) and an optional text description below it. When used effectively, panels make your channel feel polished and professional, turning a chaotic profile into a clear, branded layout.
It’s worth clarifying the difference between Twitch panels and Twitch banners:
- Panels live below your stream, under the “About” section. They’re clickable graphics used for navigation and information.
- Banners, on the other hand, are the large header images that appear at the top of your channel—more like a profile cover photo.
So, while panels help your audience understand your channel, banners help them recognize it visually. If you want to explore banner design, check out our guide on Twitch channel banners. But for now, we’ll focus on mastering the panels below your stream.
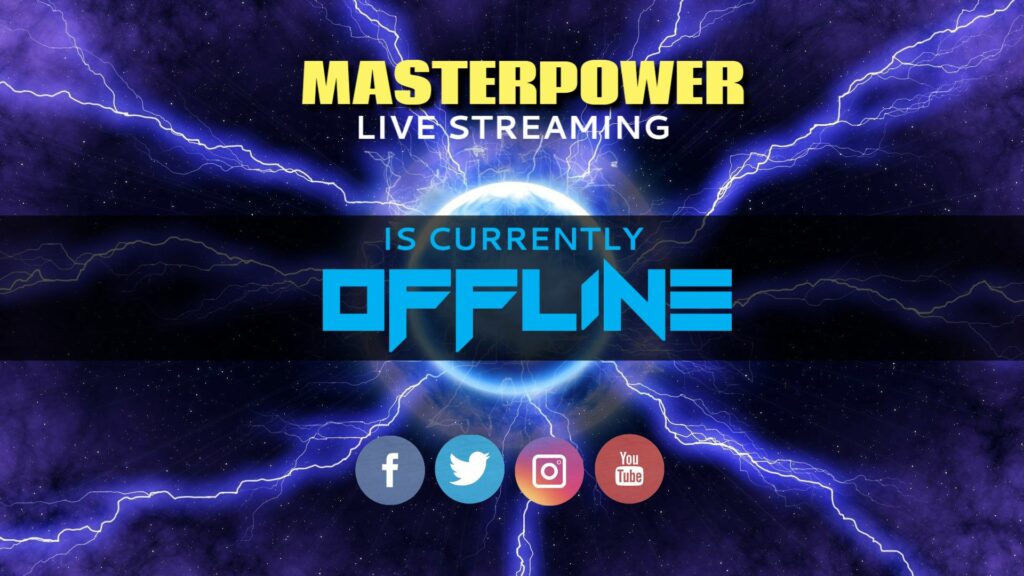
An example of a Twitch banner
Do people still use Twitch panels today?
Absolutely. Twitch panels are still part of every channel’s About page. Even though Twitch has evolved with new layouts and streaming tools, panels remain a key feature for streamers who want their channels to look complete and professional.
Think of them as the “footer” of your Twitch identity. Viewers scroll down after watching a stream to learn more about you: your story, schedule, gear, or social links. Without panels, your channel can feel unfinished—like a website without a contact page.
Panels also help with discoverability and trust. Brands and potential sponsors often check panels to see how organized your channel is before reaching out for collaborations. And for returning viewers, panels are a quick way to catch up on updates or find your social links.
So, in short, yes. Twitch still has panels, and they’re more relevant than ever. They’re not just decoration; they’re a subtle but powerful part of your streaming brand!
Twitch panel size template & file specs
Before you start designing, it’s essential to know the correct Twitch panel size template. If your panels are too wide or too tall, Twitch will automatically resize them. That can lead to blurry graphics or uneven spacing.
Here’s what you need to know:
- Recommended width: 320 pixels (fixed)
- Recommended height: Between 80 and 600 pixels (Twitch allows some flexibility, but consistency looks best)
- File formats: PNG or JPEG
- File size limit: Under 2.9 MB per image
These specs come straight from Twitch’s own guidelines, so they’ll display properly across desktop and mobile views.
When designing in MediaModifier, simply set a custom canvas size of 320 × 160 px (a balanced height that works for most panel types). If you want extra sharpness, you can design at 640 × 320 px and scale it down before uploading.
A few quick tips for best results:
- Leave generous padding around text or icons — cramped panels look unprofessional.
- Use high-contrast colors for visibility on both light and dark Twitch themes.
- Keep file names short and relevant (for SEO and quick editing).
Once your panels are sized correctly, they’ll look crisp, aligned, and perfectly proportioned on every screen.
What should you put in your Twitch panel?
Your panels tell your story before you even start streaming. Each one has a purpose: to inform, connect, or invite action. Here’s a breakdown of the most useful types of panels and what to include in each.
1. About Me panel
This is where new viewers get to know you. Keep it short and genuine. Think of it as your elevator pitch.
What to include: your name or alias, where you’re from, the type of content you stream, and one fun personal fact.
Tip: Use your About Me Twitch panel template to showcase your personality visually — bright colors for energetic streamers, neutral tones for minimalist or calm styles.
2. Schedule panel
Let viewers know when to catch you live. Keep it visual: a clean design with simple days and times works better than long text.
If your schedule changes often, write “Check Twitter for updates” or “Streaming 3x/week!” to stay flexible.
3. Rules panel
This one helps maintain a friendly chat environment. Keep it positive, concise, and easy to read. For example: “Be kind, no spam, no spoilers. And most importantly, have fun!”
4. Donations or Tips panel
If you accept support from viewers, link your PayPal, Ko-fi, or Streamlabs page. Add a short thank-you message to make it personal.
5. Socials panel
Invite viewers to follow you on other platforms, such as X, YouTube, TikTok or Discord. Use small icons and consistent design so all your panels look like part of the same set.
6. PC Specs or Gear panel
Perfect for tech-savvy audiences. List your microphone, camera, or GPU setup in short bullet points.
Pro tip:
Group panels by importance: personal info first (“About” and “Schedule”), community guidelines next, and external links last. This order feels natural for new visitors exploring your page.
With clear, consistent panels, you’ll make your Twitch channel look polished, trustworthy, and easy to navigate.
Design tips for high-performing panels (fast wins)
Creating good-looking panels isn’t about being a professional designer. It’s about clarity, consistency, and keeping things easy to read. Whether you’re starting from a panel template for Twitch or building from scratch in MediaModifier, these simple design rules will help your panels look cohesive and professional.
1. Keep your layout clean
Each panel should have one clear message: “About Me,” “Schedule,” “Donate,” etc. Avoid crowding text and icons — white space makes designs feel polished and readable.
2. Choose the right contrast
Twitch supports both dark and light themes, so make sure your colors work in both. Light text on dark backgrounds tends to be easier on the eyes.
3. Stay consistent with color and typography
Your panels are part of your brand identity. Use the same color palette and font family across all of them. If your Twitch banner has neon accents or gradients, apply those touches to your panels for a cohesive style.
4. Make icons do the heavy lifting
Icons quickly communicate what each panel is about — a clock for your schedule, a heart for donations, or a chat bubble for rules. Keep icons simple and recognizable, ideally in the same style set.
5. Optimize for legibility
Avoid long sentences inside your panel design. Instead, keep text to one or two short lines and move the rest of the details to the text description below the panel image.
6. Test how your panels look on Twitch TV
Upload a few and check how they display on your channel’s About page. Twitch compresses images slightly, so verify that text remains sharp and centered. If something looks off, tweak your design dimensions in the editor and re-upload.
7. Bonus tip — align panels with your banner design
If you already use one of MediaModifier’s Twitch banner templates, you can borrow the same color scheme or typography for visual harmony. Just remember: banners and panels serve different purposes — one promotes your brand at the top, the other informs below.
Great panels don’t shout. Keep them visually balanced, easy to read, and true to your streaming personality.
Step-by-Step Tutorial: Build a Twitch panel template in minutes
You don’t need Photoshop or design experience to make professional Twitch panels. With MediaModifier’s online editor, you can build your own Twitch panel template from scratch, customized to your exact style and size. Here’s how to do it in just a few steps.
Step 1: Create a new custom design
Head to MediaModifier’s editor (yes, it works for any layout). Click “Create a Design” and enter your custom size:
👉 320 × 160 pixels — the perfect dimensions for a Twitch panel.
If you want a sharper result, design at 640 × 320 pixels and scale it down before uploading.
Step 2: Choose your base style
Pick a layout or background that fits your personality — minimal, neon, gaming-inspired, or cozy pastel. You can browse banner or card templates, then hit “Resize” in the editor to adapt them to panel dimensions.
Step 3: Add your title text and icons
Type your label (“About Me,” “Schedule,” “Donate”) in bold, legible font. Then, drag in small icons to make your panels easier to scan. Try to keep text centered and avoid walls of words. Clarity wins every time.
Step 4: Customize colors and graphics
Tweak the background, gradient, and shapes until your design feels balanced. For a cohesive look, reuse the same colors you have in your Twitch banner or overlays.
Step 5: Export your panels
Download each design as a PNG or JPEG, keeping the file size under 2.9 MB. Then head to your Twitch channel, scroll down to the About section, and click “Edit Panels”. Upload your images, add short descriptions or links, and arrange them in your preferred order.
Pro tip: Test your layout on both desktop and mobile views. Twitch compresses images slightly, so make sure all text stays sharp.
Once you’ve built your base design, you can reuse it as your personal Twitch panel template, updating only the titles and icons as your channel evolves.
Editable panel looks you can resize in our editor
MediaModifier’s flexible editor gives you full freedom to create your own Twitch panel. You can start from any design — banner, social media post, or card — and resize it to Twitch panel dimensions with a few clicks.
Here are some editable looks and ideas you can adapt into professional Twitch panels today:
1. Minimal monochrome set
Clean backgrounds, subtle shadows, and simple typography. Perfect for streamers who prefer a sleek, understated aesthetic. Works great for “About Me” or “Rules” panels.
2. Gradient and neon glow set
Inspired by gaming and tech branding. Combine bright gradients, electric blues, and purples for energy and personality. These designs work best for “Donate” or “Follow Me” panels.
3. Pastel and rounded designs
Soft colors, curved corners, and friendly icons — ideal for cozy streamers, artists, or IRL creators. This approachable look makes your “Schedule” or “Community” panels feel welcoming.
4. Dark mode, high-contrast designs
Designed to pop against Twitch’s dark theme. Pair bold white text with dark gradients or black backgrounds for maximum readability.
5. Icon-first micro panels
Compact with small, centered icons and short labels like “Gear” or “Tips.” Great if you want a clean, info-dense channel layout.
To try these looks:
- Open any design from the Twitch banner template collection.
- Click “Resize” → “Custom Size”, and enter 320 × 160 px.
- Adjust the layout and text to fit your panel’s message.
Within minutes, you’ll have a full, branded set of Twitch panels that match your overall channel style (without needing separate templates).
Conclusion
Your Twitch panels are the unsung heroes of your channel: small details that make a big difference in how viewers perceive your brand. A well-designed set of panels tells your story, highlights your schedule, and gives your page a professional edge that builds trust and keeps visitors coming back.
You don’t need design experience or special software to get it right. With MediaModifier’s easy-to-use editor, you can build your own Twitch panel template, customize it to your brand colors, and resize designs instantly for perfect display.
Take a few minutes to create your panels today. And give your Twitch channel the clean, cohesive look it deserves.
Ready to start? Head to MediaModifier’s design editor and create your first Twitch panel layout today. It’s fast, flexible, and completely online.
Frequently Asked Questions
What is a Twitch panel?
A Twitch panel is a clickable graphic that appears in the About section of your Twitch channel. It’s used to display information such as your bio, schedule, social links, and donation options. Panels help structure your profile and make it easier for new viewers to navigate your channel.
What is a Twitch banner?
A Twitch banner (also known as a cover image) is the large header graphic that appears at the top of your channel page. It’s used to represent your brand visually—showing your logo, tagline, or streaming schedule. Unlike panels, banners are not clickable and don’t sit below the video player.
What is the difference between a panel and an overlay on Twitch?
A panel is part of your channel’s static layout — shown on your About page, even when you’re offline. An overlay, on the other hand, appears on-screen during your live stream (for webcam frames, alerts, or chat boxes). Panels organize information for viewers; overlays enhance the live viewing experience.
Does Twitch still have panels?
Yes. Panels remain a core part of the Twitch layout in 2025. They appear below your stream and are fully customizable through your channel’s About page. You can add, edit, or rearrange them anytime.
How to create a Twitch panel?
You can create a Twitch panel in a few simple steps:
- Open MediaModifier’s design editor and start a blank design.
- Set a custom size of 320 × 160 px.
- Add your text (like “About” or “Donate”) and an icon.
- Customize colors and style to match your channel branding.
- Export as PNG and upload it to your Twitch About section under “Edit Panels.”
What should I put in my Twitch panel?
The most common panels include “About Me,” “Schedule,” “Rules,” “Donate,” and “Socials.” You can also add panels for PC specs, sponsors, or affiliate links. Each panel should be short, clear, and visually distinct.
What’s the good Twitch panel size and file type?
Twitch panels should be 320 pixels wide, between 80 and 600 pixels tall, and saved as PNG or JPEG files under 2.9 MB. Designing at double resolution (640 × 320 px) and scaling down before uploading ensures sharp, clean results.
How many panels should I use?
Most streamers use between five and ten panels. The goal is clarity — include enough information to guide viewers but avoid overcrowding your About page.
Can I edit panels while live?
You can edit or reorder panels anytime, even while your stream is active. Just open your channel page, scroll to the About section, toggle “Edit Panels”, and upload or replace your images.
How do I match my panels with my banner without mixing them up?
Use similar colors, fonts, or icon styles across both, but keep layouts distinct. Your Twitch banner is the large header at the top of your channel, while panels live below your stream. For banner ideas, check out MediaModifier’s Twitch banner templates.
Related articles

Visualize your design Use a product mockup to showcase your design
Create your design Use our templates to create delightful designs for any medium