How to Make a Mockup in Photoshop
Product mockups are real time-savers when you need a quick way to visualize your ideas, showcase your design to a client or present your product when it doesn’t even exist yet.
There are already hundreds of websites offering Photoshop Mockup Templates, however making a mockup yourself is not that complicated.
This tutorial will help you master this useful skill so you will be able to turn any photograph into a beautiful PSD template.
The Why and How?
As a small business owner and entrepreneur I constantly struggled with finding the perfect PSD mockups to visualize my ideas. One day I simply gave up the search and decided to create my own mockup in Photoshop.
Turns out this was one the best decisions in my life as the hobby of creating my own mockups led to the creation of a successful online business – Mediamodifier.com
I’ve used the same techniques described in this post to create over 2000 product mockups in Photoshop and this post will reveal all the tricks and best practices I’ve used over the years.
In this lengthy tutorial you will learn all the skills on how to take any photo and turn it into a beautiful and professional product mockup template which you can reuse and edit later – all you need is Photoshop
The end result will be a useful and professional looking mockup and most importantly a new skill to create your own mockups for any kind of products, an irreplaceable skill in online marketing.
I’ve also included example Photoshop Mockup files and useful PSD actions which will help you automate the process of creating layers or masks and turn solid colors (for example white T-shirt or mug) into editable color layers.
The topics covered in this article:
- Overall Technique of Making Photoshop Mockups + CV Example PSD;
- Change Color of Any Mockup Object and Make it Easily Editable;
- Download useful Photoshop Actions for creating Mockups.
But first, let’s take a look at a few examples of what you can achieve after going through this tutorial:
How to Make a Mockup in Photoshop – The Overall Technique
The overall technique for creating product mockups in Photoshop is basically universal, the process is usually always the same:
- Customize the background scene for your mockup;
- Create the smart object(s) for your placeholder;
- Warp, stretch or distort your placeholder into the correct position;
- Apply effects, filters or masks to make it look professional;
- Advanced: Change color of any object or background.
Different Types of Product Mockups
Before we jump into the creation process, I will also provide a bit of background information about the different types of product mockups out there – it might prove helpful for promoting your content with mockups.
Digital Product mockups are usually divided into 2 main categories (which in turn divide into smaller categories themselves):
- Mockups with a real photographic background which are used to attach a bit of emotion to your product by showcasing it in a real life scene;
- and mockups with a transparent or solid color background which are mostly used as ‘dry’ product shots for displaying the basic shape or features of your product with no bells and whistles.
For example while advertising your iPhone app you might want to showcase your app screenshot on a blank iPhone screen just to display the User Interface. The other option is to use an image of someone actually holding the phone and using your app in a real-life situation.
So now that you know what we’re up to, and you’re still reading this then let’s jump right in – open up Photoshop (probably open already) and let’s get started!
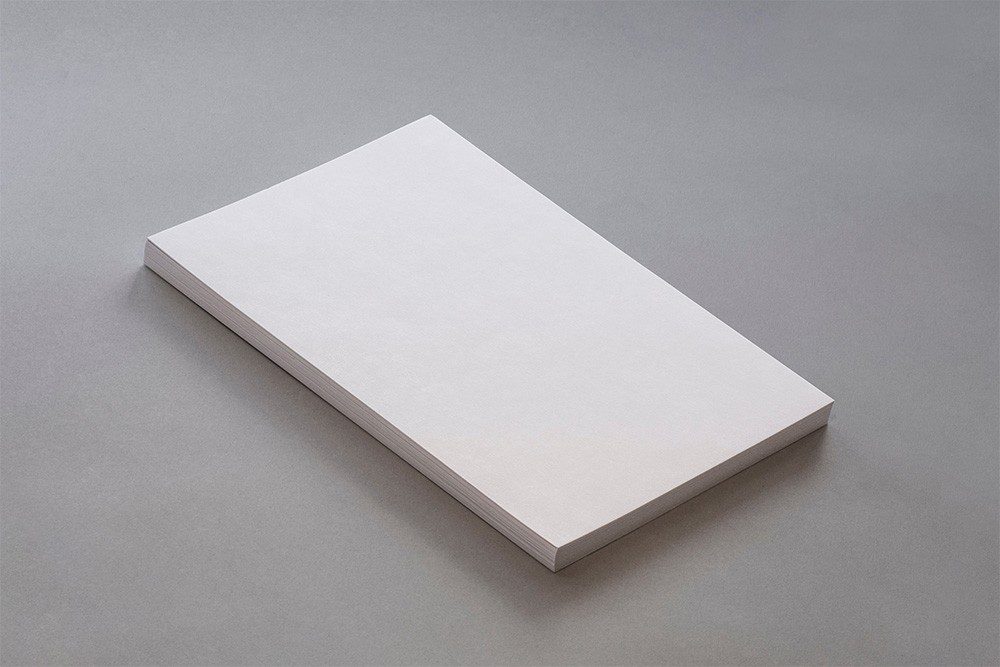
1) First – Customize the Background Scene for Your Mockup.
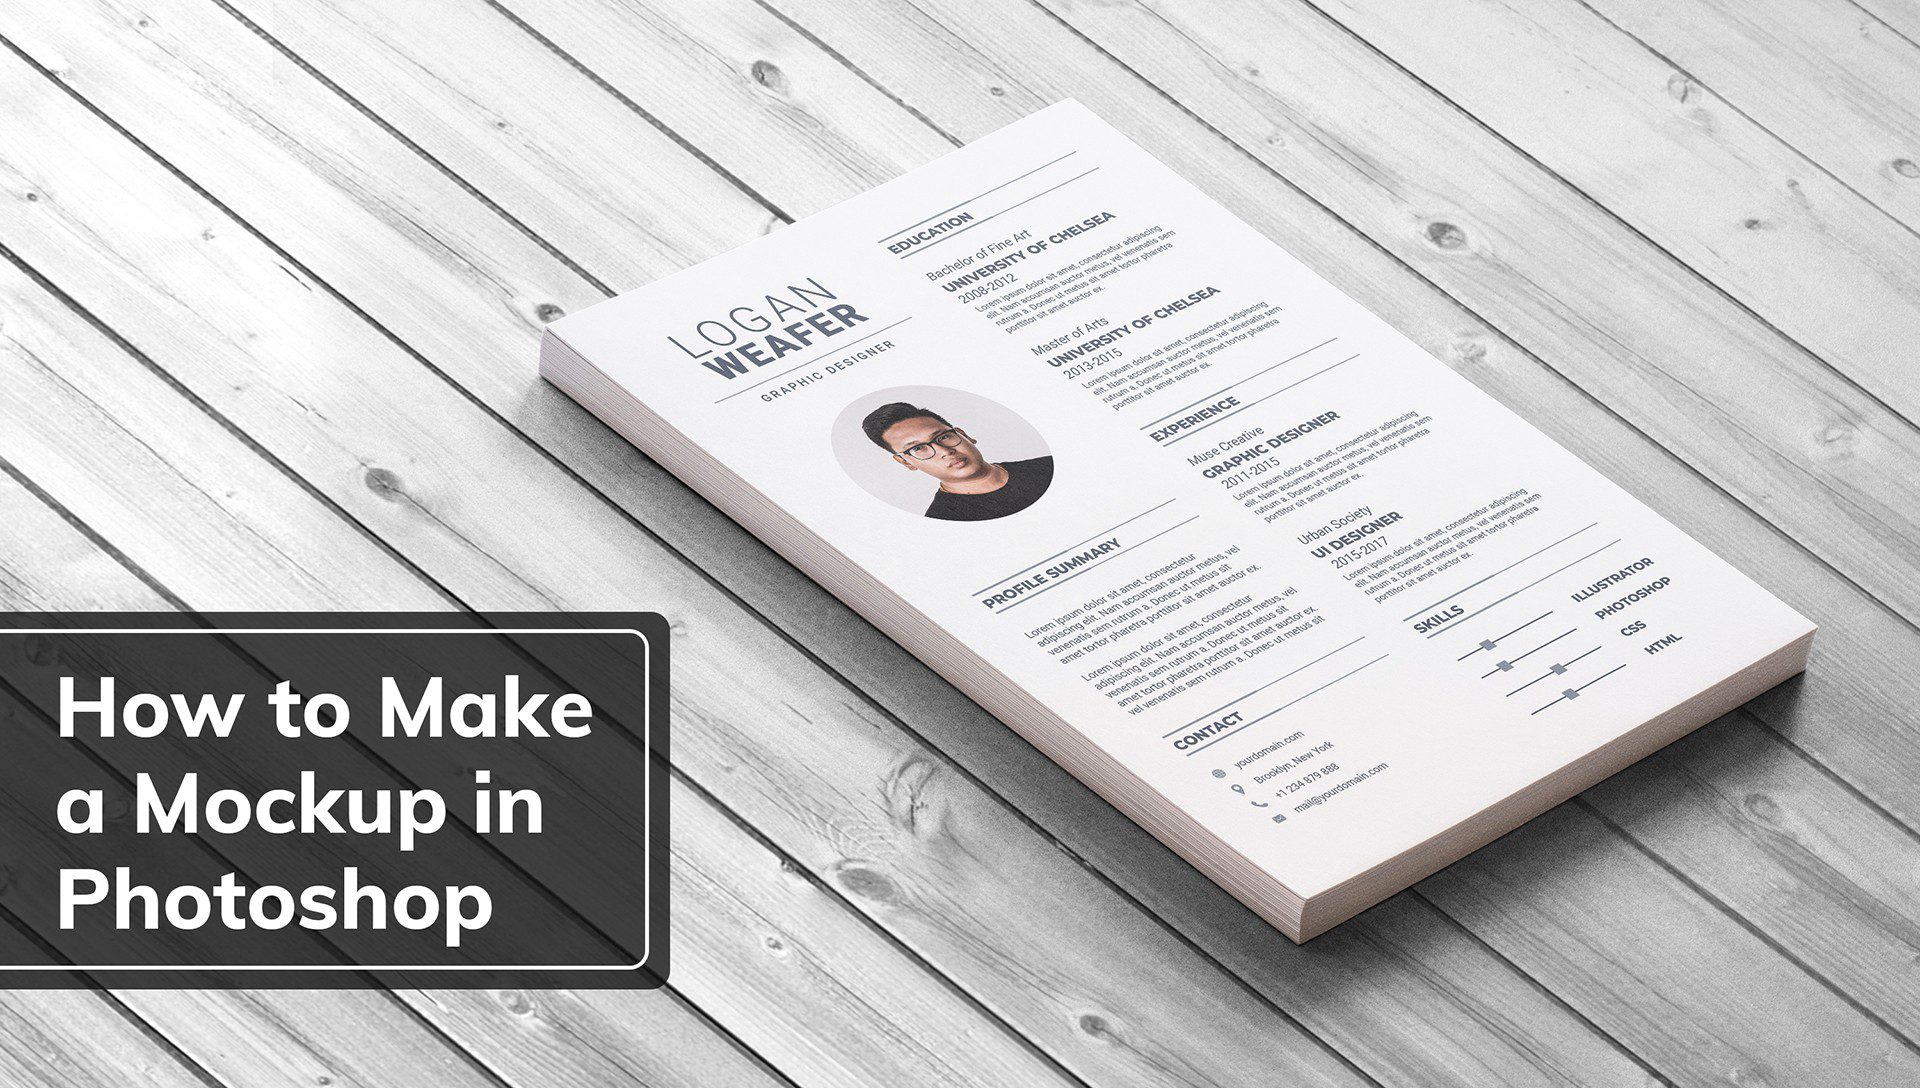
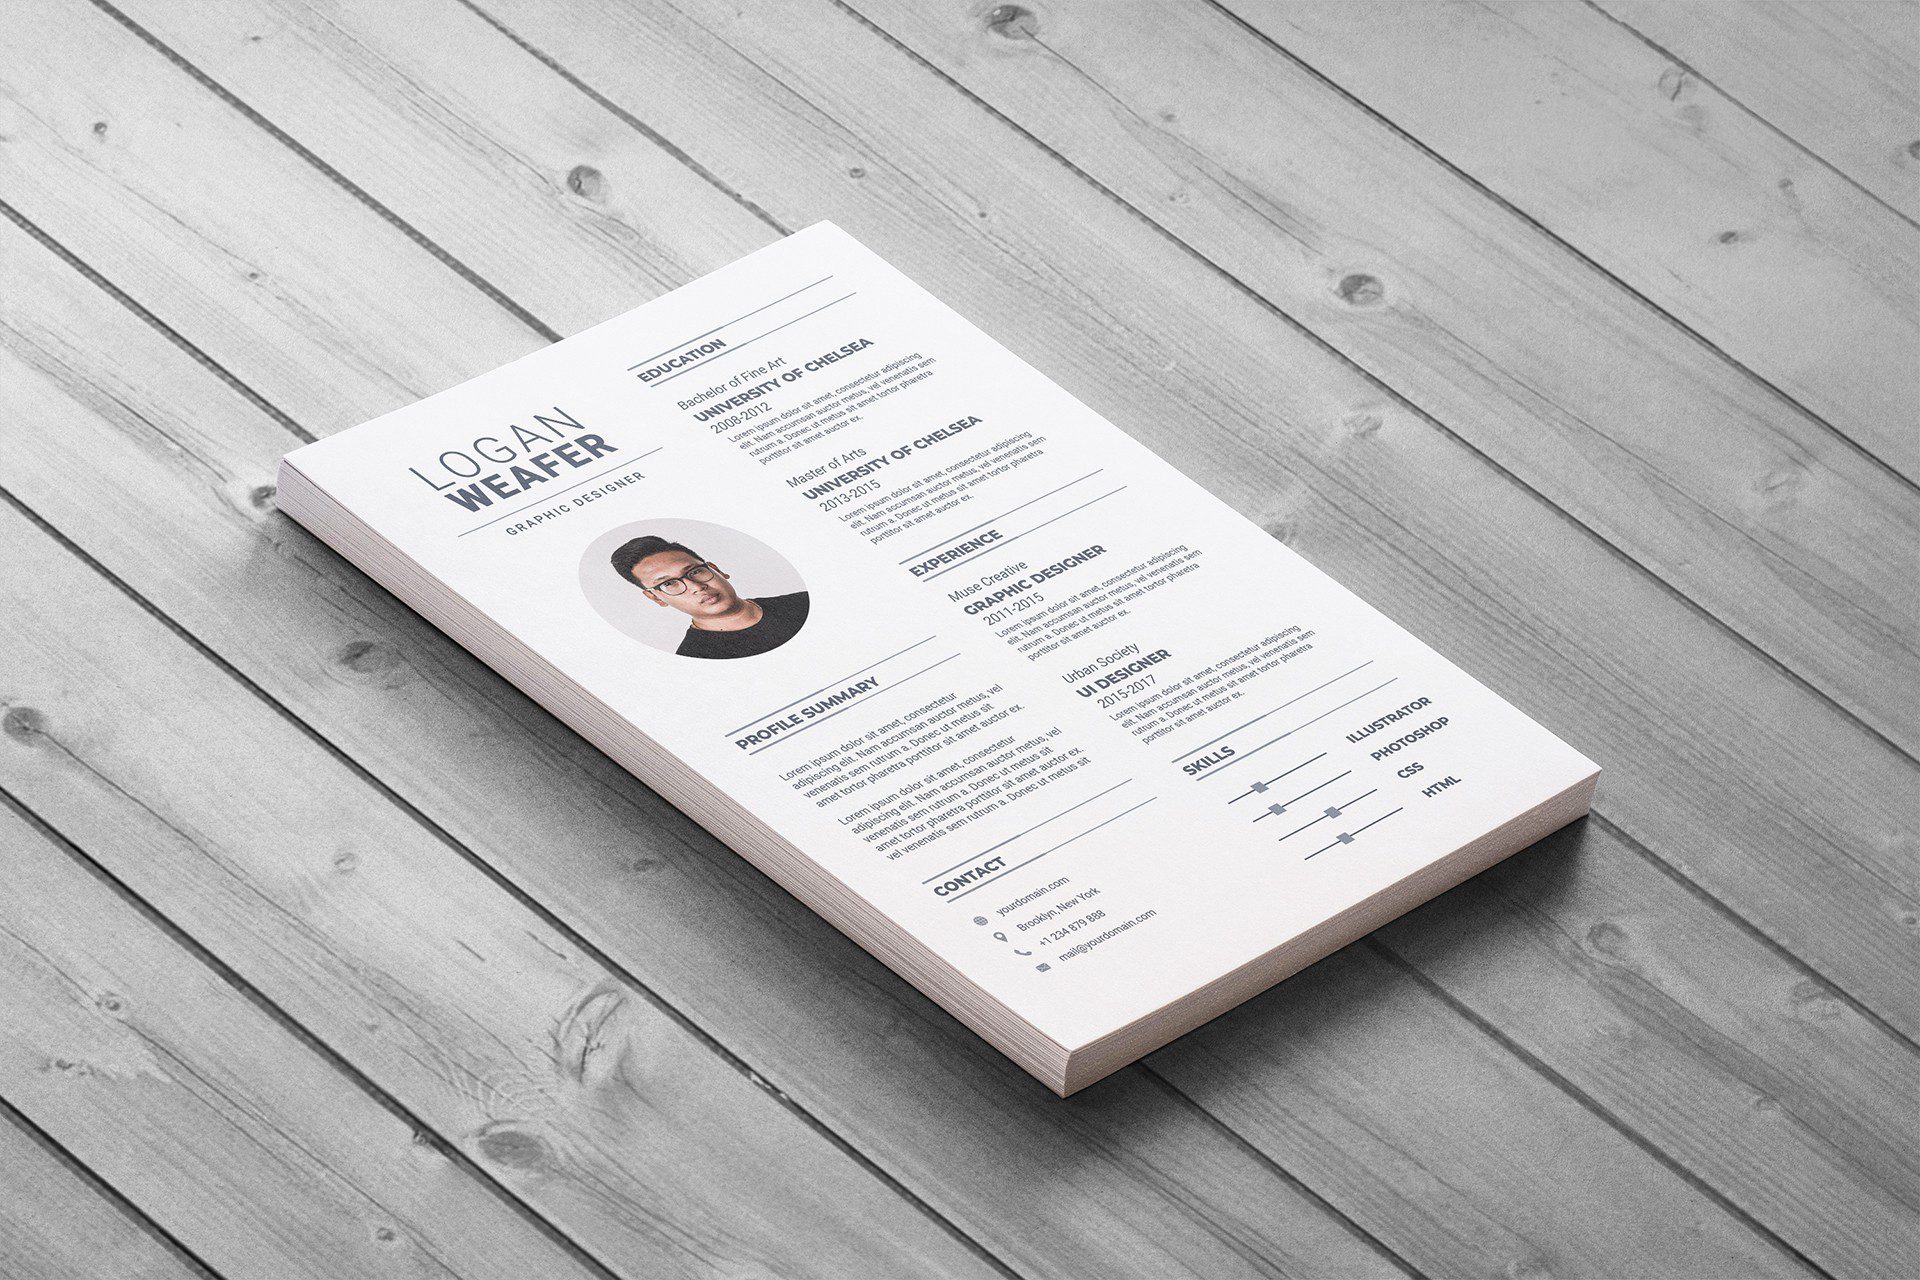
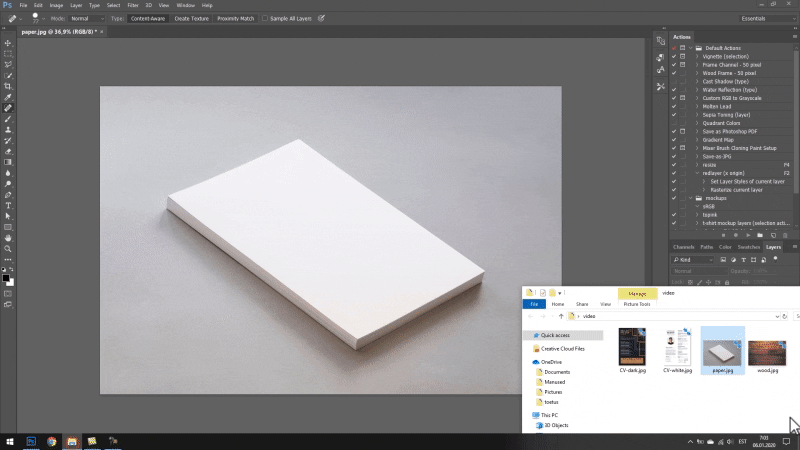
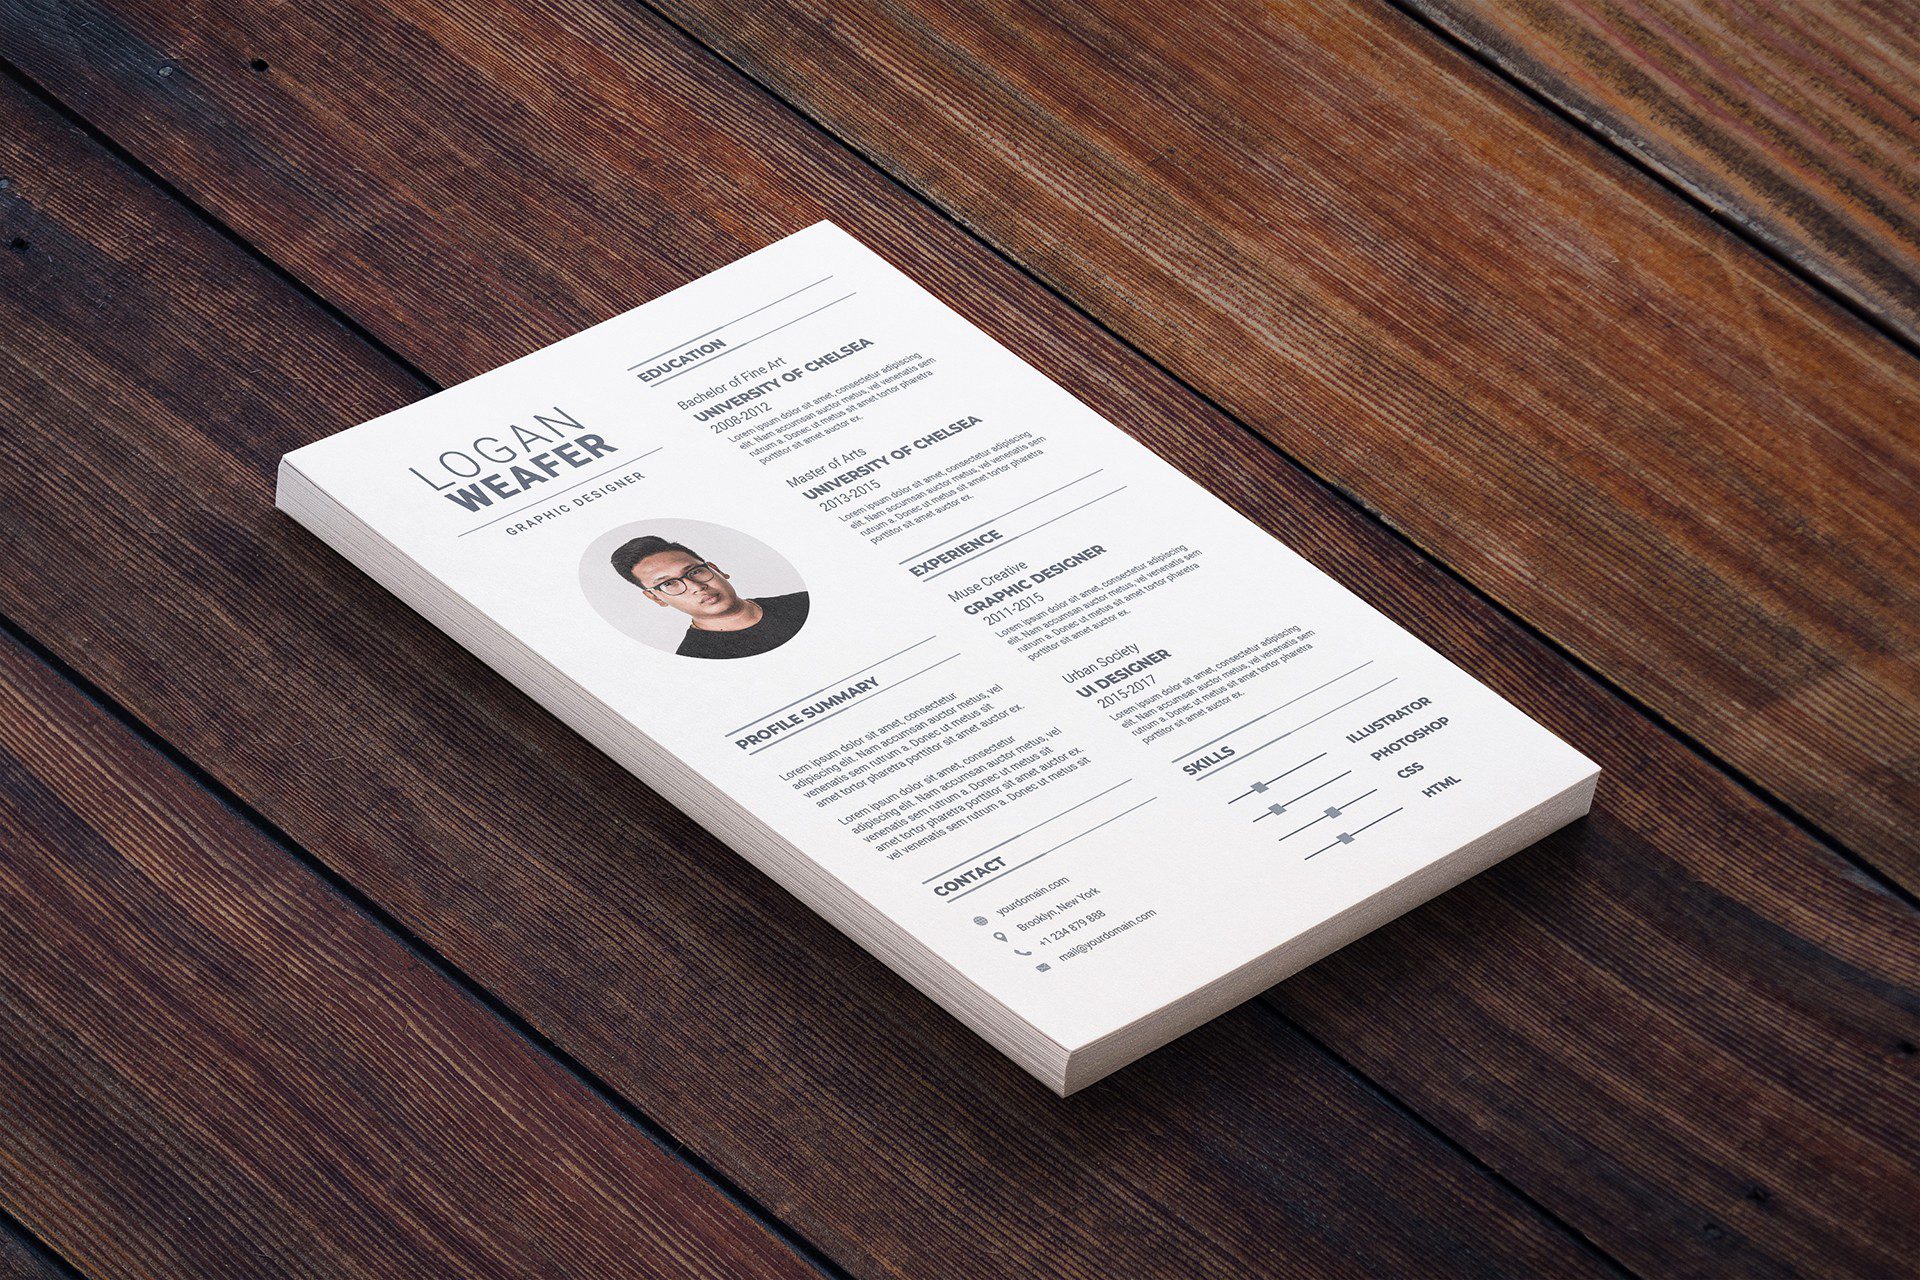
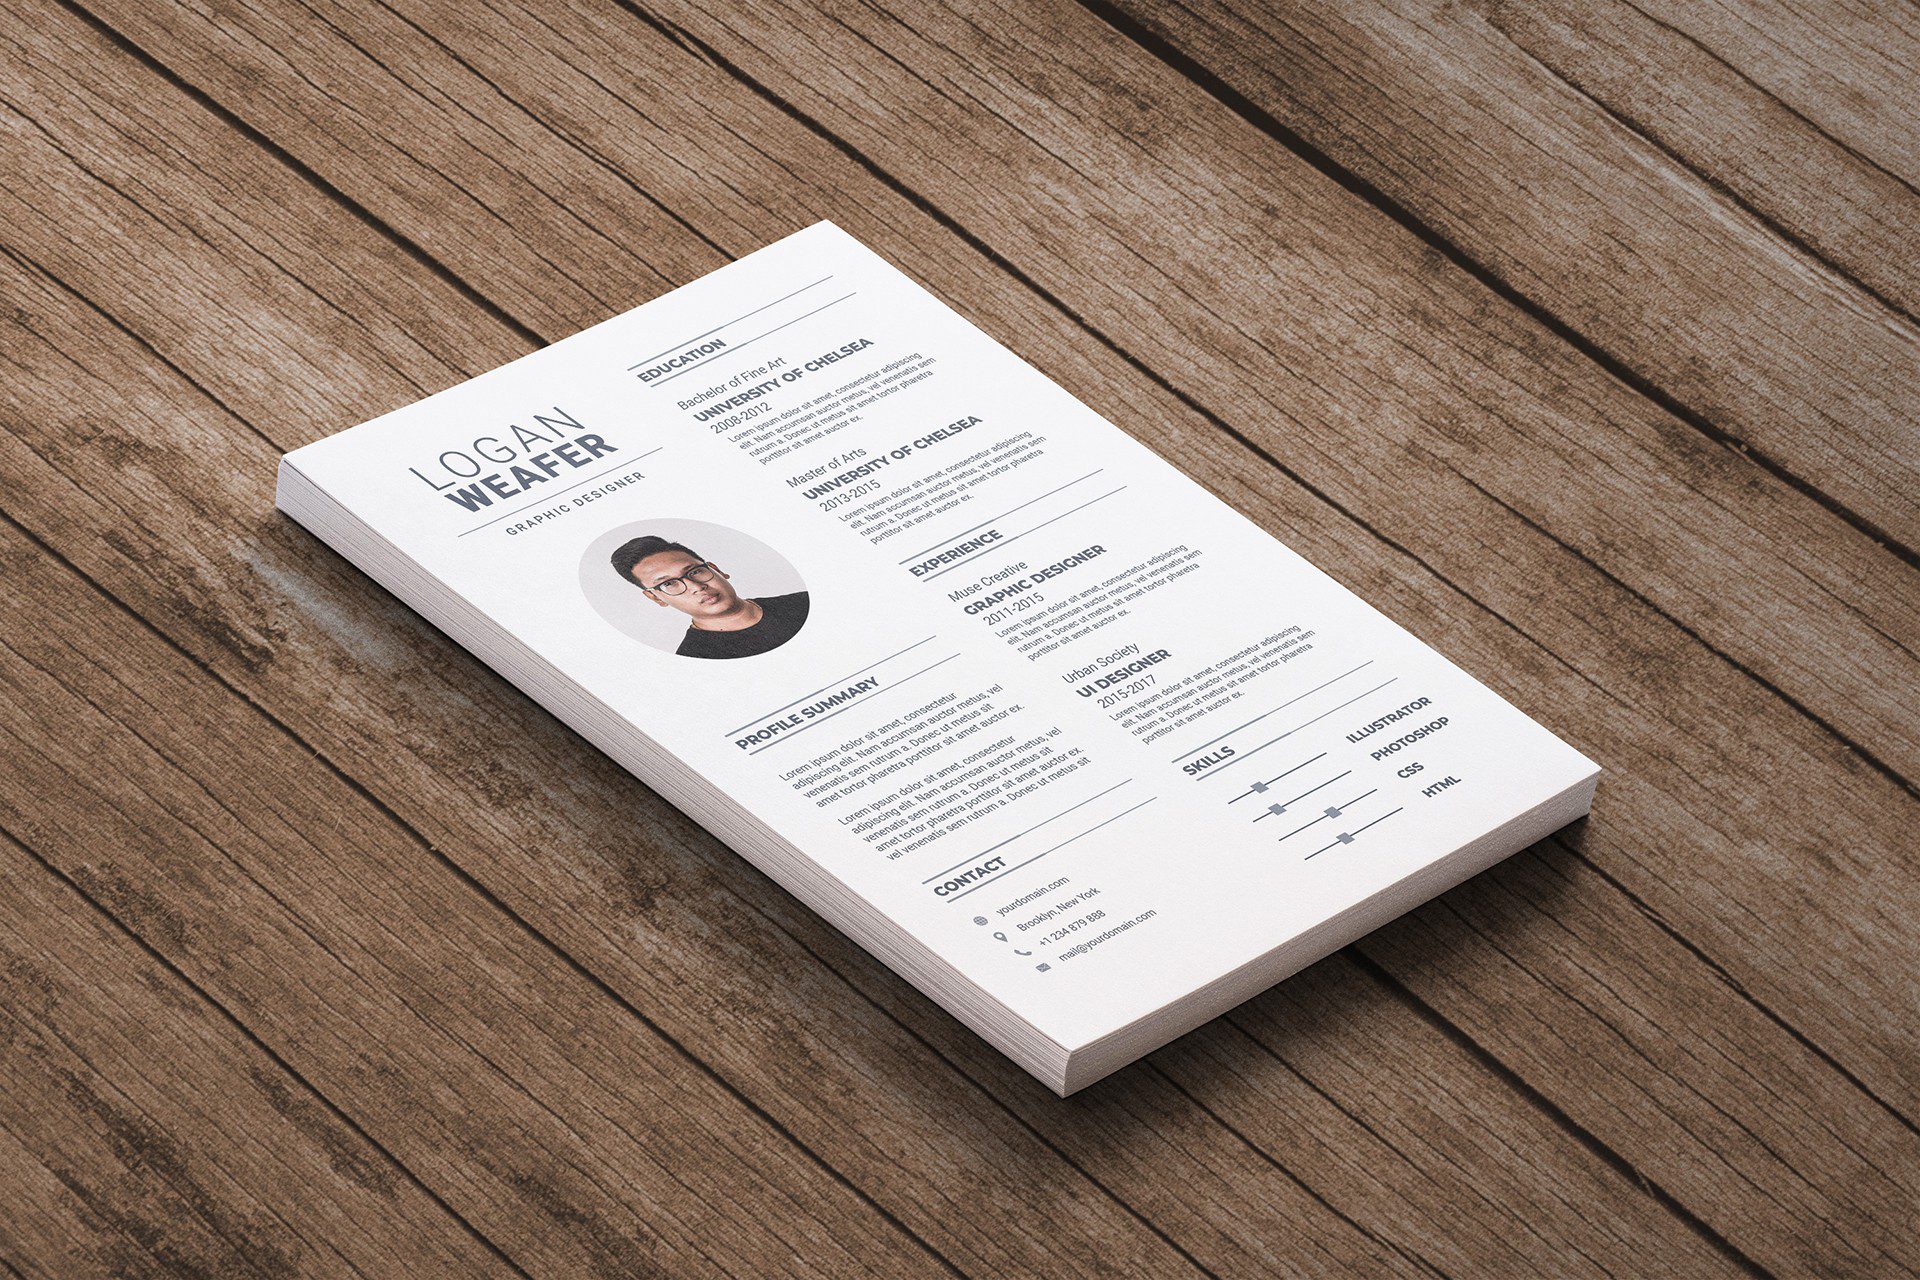
In the first example we’ll make a simple CV and letterhead mockup based on a real photograph. (Thank you Brando for the image)
but you can also try this tutorial with your own photo or find a suitable free stock photo from Pixabay.com or Unsplash.com
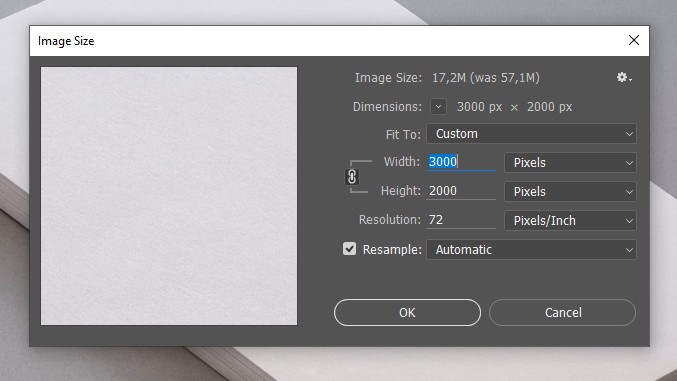
Resize Image
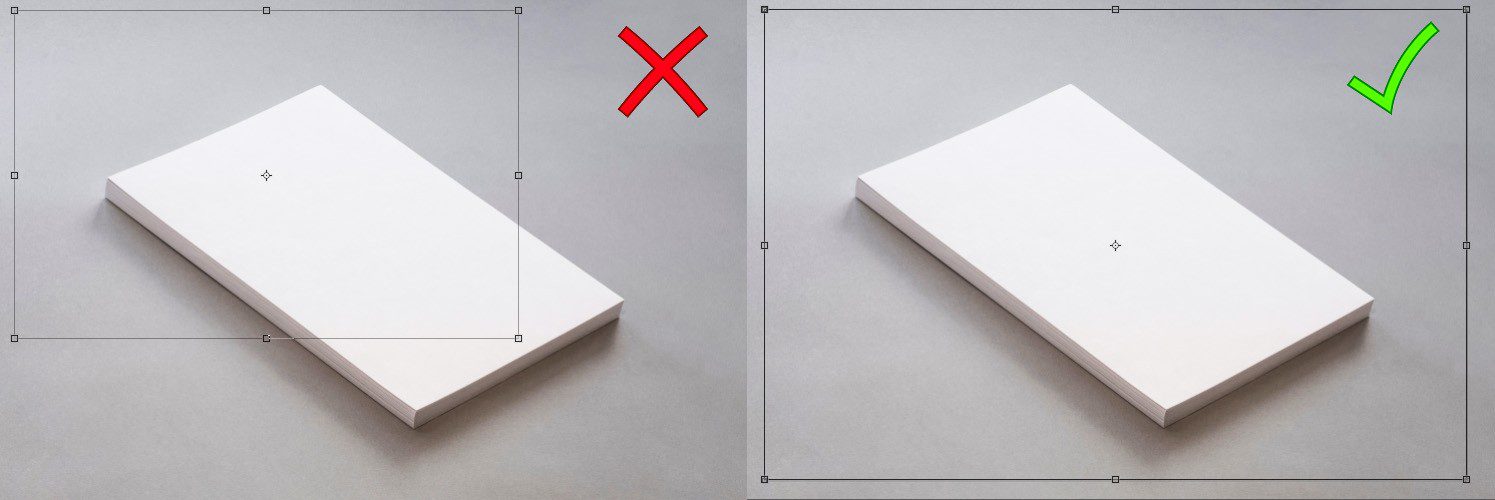
Load your image into Photoshop and change the image size. Most likely you won’t be needing a mockup with a resolution over 4000px. The larger the image size is, the larger Photoshop file sizes will get, so a width anywhere between 3000px-2000px should be okay for most web uses.
Otherwise you might end up with a large and clunky PSD which might slow down your computer while you make edits.
In this example I’ve resized the background scene to 3000x2000px.
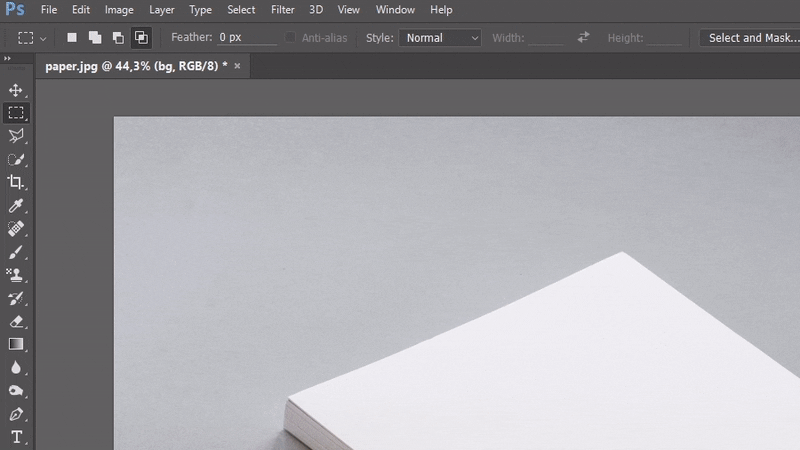
Optional Retouching
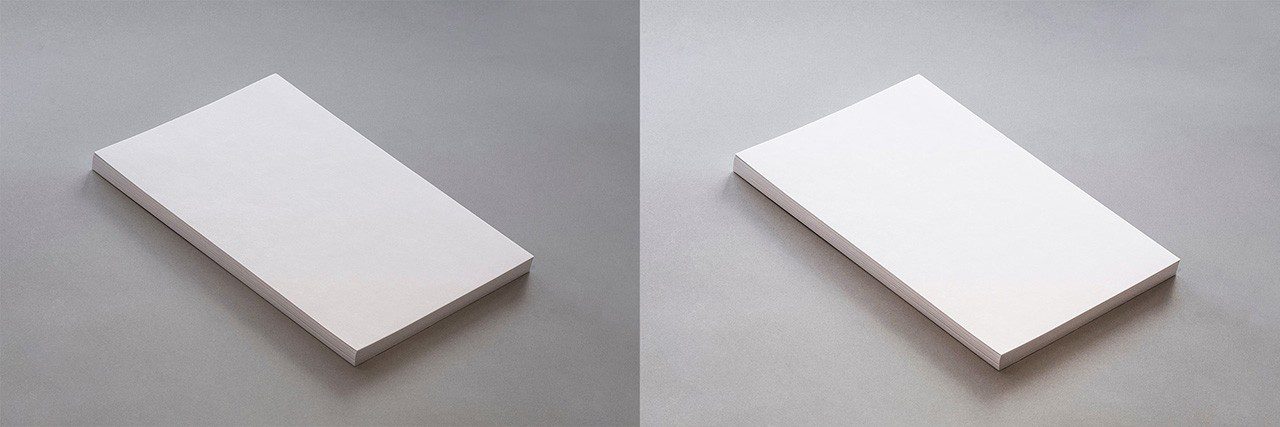
No photograph is usually perfect, so I normally use the Spot Healing tool to fix any stains, dust or any unnatural spots on the picture.
If you need to remove very complex objects from your photo, be sure to check out Pincel – a simple and powerful AI powered object remover, which handles removing blemishes much better compared to Photoshop remover tool or spot healing brush.

Also let’s tune up the brightness/contrast up a bit because the image is too dark.
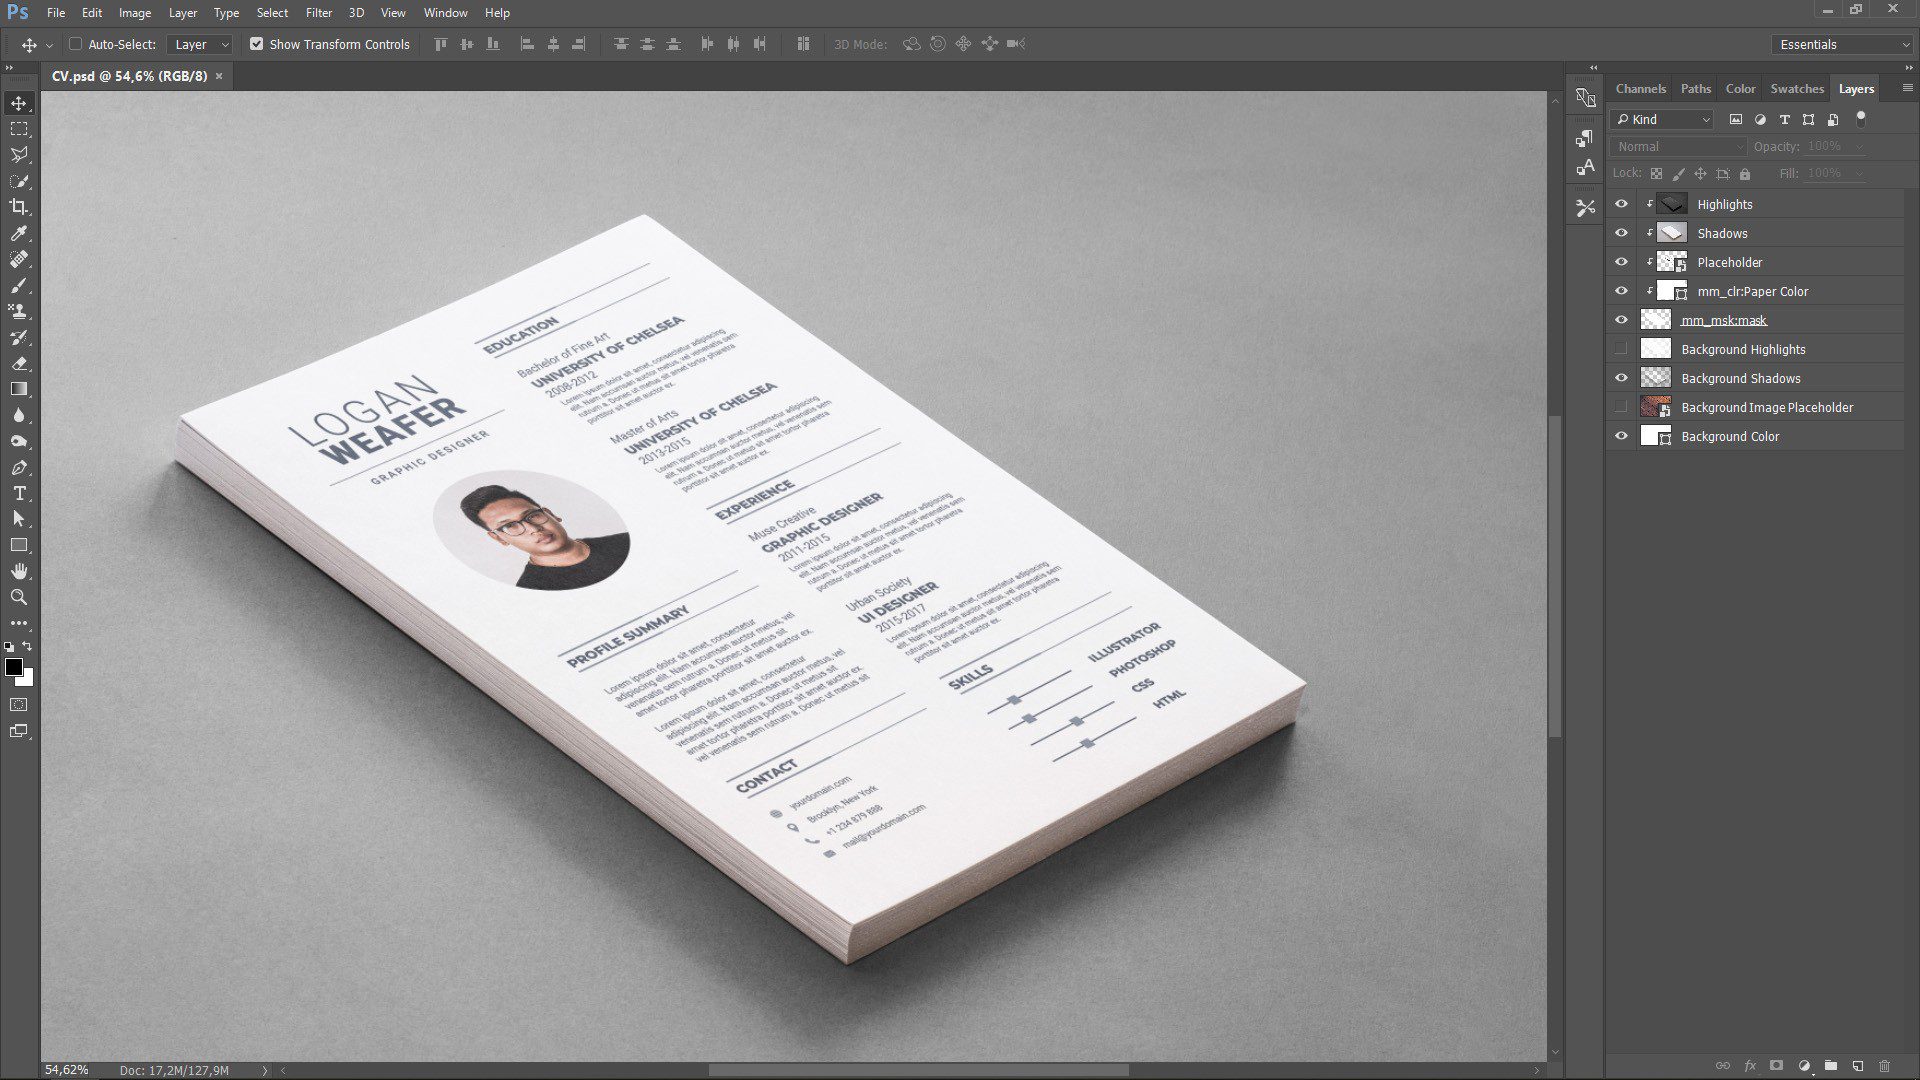
2) Creating a Placeholder by a Using Photoshop Smart Object
Smart object is a feature in Photoshop that allows to modify a layer, while leaving the original content inside untouched. This can be used to create placeholders for different content.
For example if we add an effect to a smart object and replace the contents of the smart object, then the effect will also be applied to the new image inside it, leaving the original image unchanged inside it.
Creating a placeholder with the correct size
The next step is to create a new smart object placeholder for your mockup.
There are 2 different approaches which you can use:
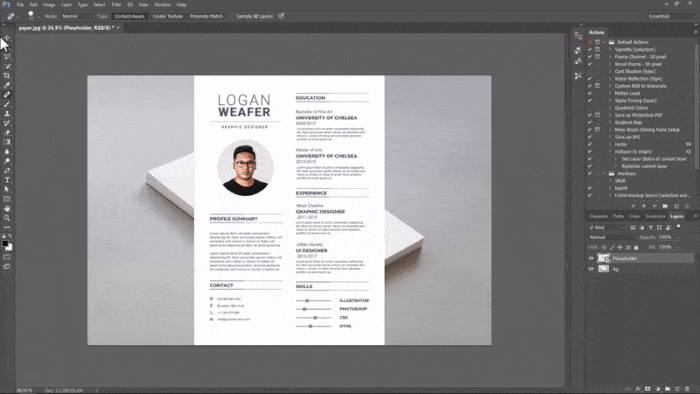
Option 1: The easiest method I always use is to directly insert an example image with the correct size into the mockup.
So for example in the CV image I already have an example CV which I want to use, and I know it has the correct dimensions of an A4 paper.
The trick here is to:
- insert your image;
- Rasterize Layer;
- Convert to smart object again.
This step will make sure that the mockup scene and placeholder image are in the same size and scale.
Option 2: Choose this method only if you don’t have a design which you want to insert into the mockup yet, but you still need to create a blank placeholder:
- Select the Rectangular Marquee Tool;
- Insert the placeholder size you need in pixels or use the size ratio.
- Create a new blank layer;
- Choose Edit -> Fill and set a solid color you like;
- Right-click on the new layer and Convert to Smart Object
For example, if you are making an iPhone mockup and you already have a screenshot you wish to insert into the screen, then it’s faster to use that image as placeholder.
but if you wish to create the placeholder, and then later find the content to put inside, you need to first find out the exact screen size or ration of the iPhone model or A4 CV paper as in this example.
Using the Fixed Ratio to Create a Placeholder
In the CV example my placeholder image is sized at 2100x2970px, but as the mockup scene is smaller (3000x2000px), then there’s no point in creating a placeholder with such a big size.
I will simply insert the numbers 21×29,7 into the Fixed Ratio field, then left-click above the mockup scene and drag over the image – this will create a perfectly sized placeholder selection. Now fill this layer and convert to smart objects as mentioned above.
3) Fit or Distort Smart Object into the Correct Position
The next step is now moving the placeholder into the right position and perspective:
- Select the smart object layer;
- Choose Edit-> Transform-> Distort from the upper menu;
- Move each corner of the layer into the correct position;
- Use the Warp Tool to further smooth the layer if necessary;
- Press Enter to complete.
4) Fine Tuning the Placeholder + Useful Tips
When you simply distort a layer and you only move the corners of the placeholder then it is what it is: a distorted placeholder… and it will not look very good as a mockup!
For best results, it is usually necessary to add a few effects or color masks which will make the mockup look more realistic.
The fastest way to add more realism into the mockup is to use Blend Modes. NB: this is the fastest way, but we’ll look at more advanced techniques in the next section!
Generally all white paper scenes work best with Multiply blend mode, but you can experiment which mode works best with your mockup scene.
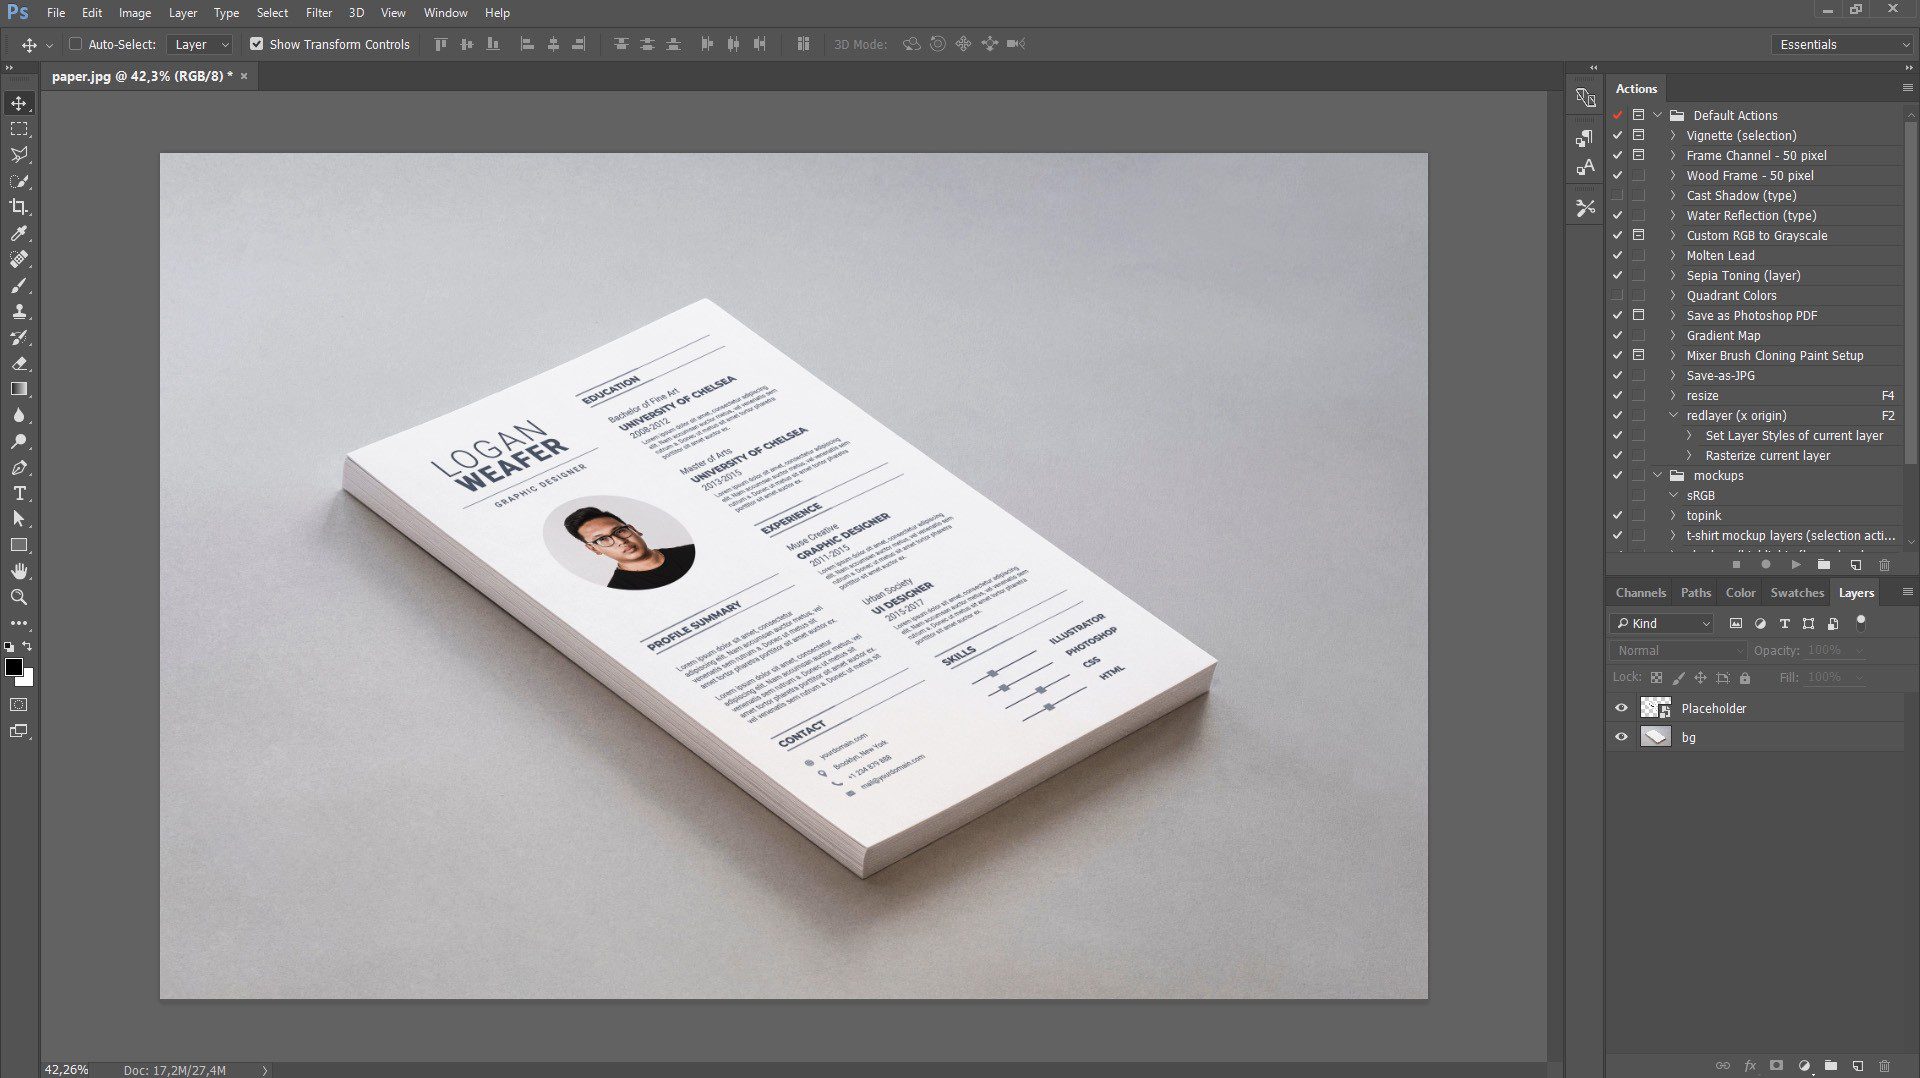
You’ve done it – it’s the easiest and most fastest way to create an editable mockup in Photoshop.
In this example we used the A4 paper scene, but you can easily use this same technique for making literally any kind of mockups:
but there’s just one issue… what if you want to change the color of the background scene, paper stack or any other object like a t-shirt or mug?
In the next section I’ll cover more advanced options for making all the colors in the mockup editable and I’ll include useful PSD scripts for making the process much faster.
5) Change the Color of Any Object in Photoshop and Make it Easily Editable + PSD Script
Now you know how to create a really basic Photoshop Mockup template which includes a rectangular placeholder smart object.
but let’s move forward with some advanced methods which will make you a mockup professional!
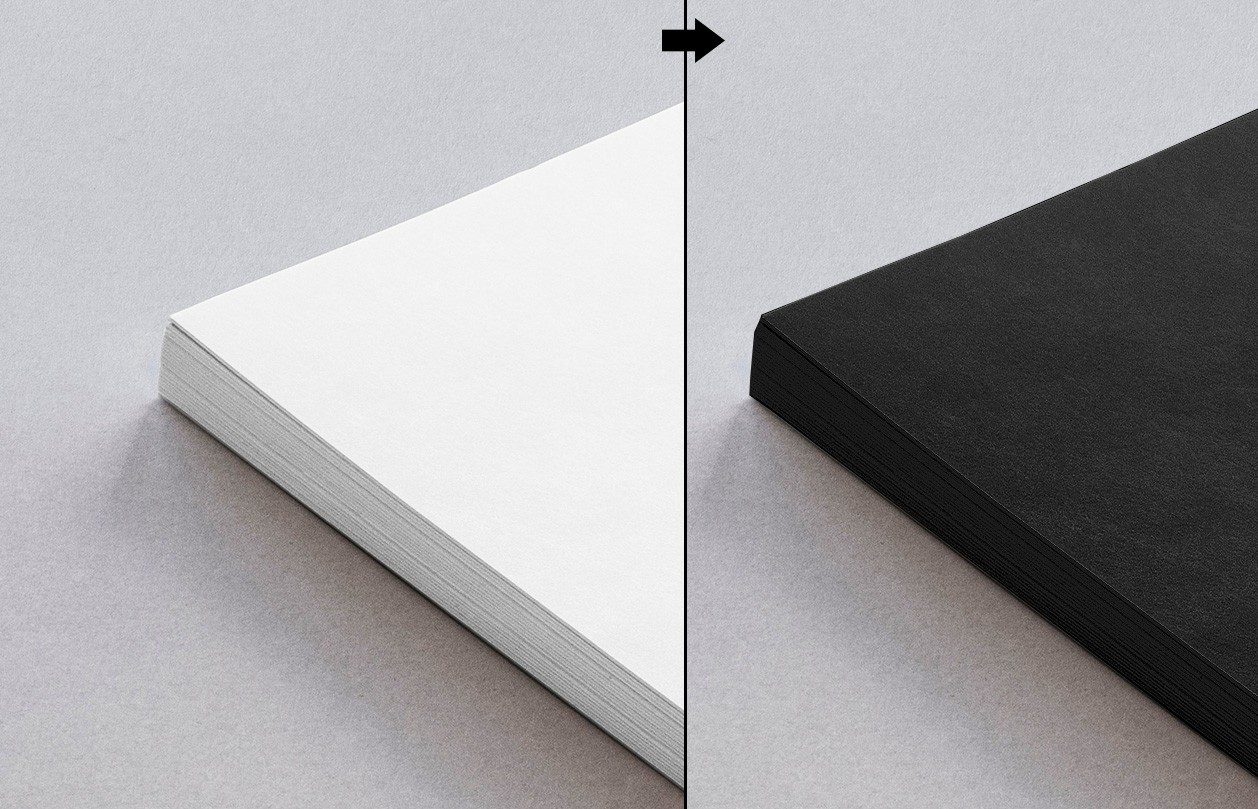
Change the color of a mockup object.
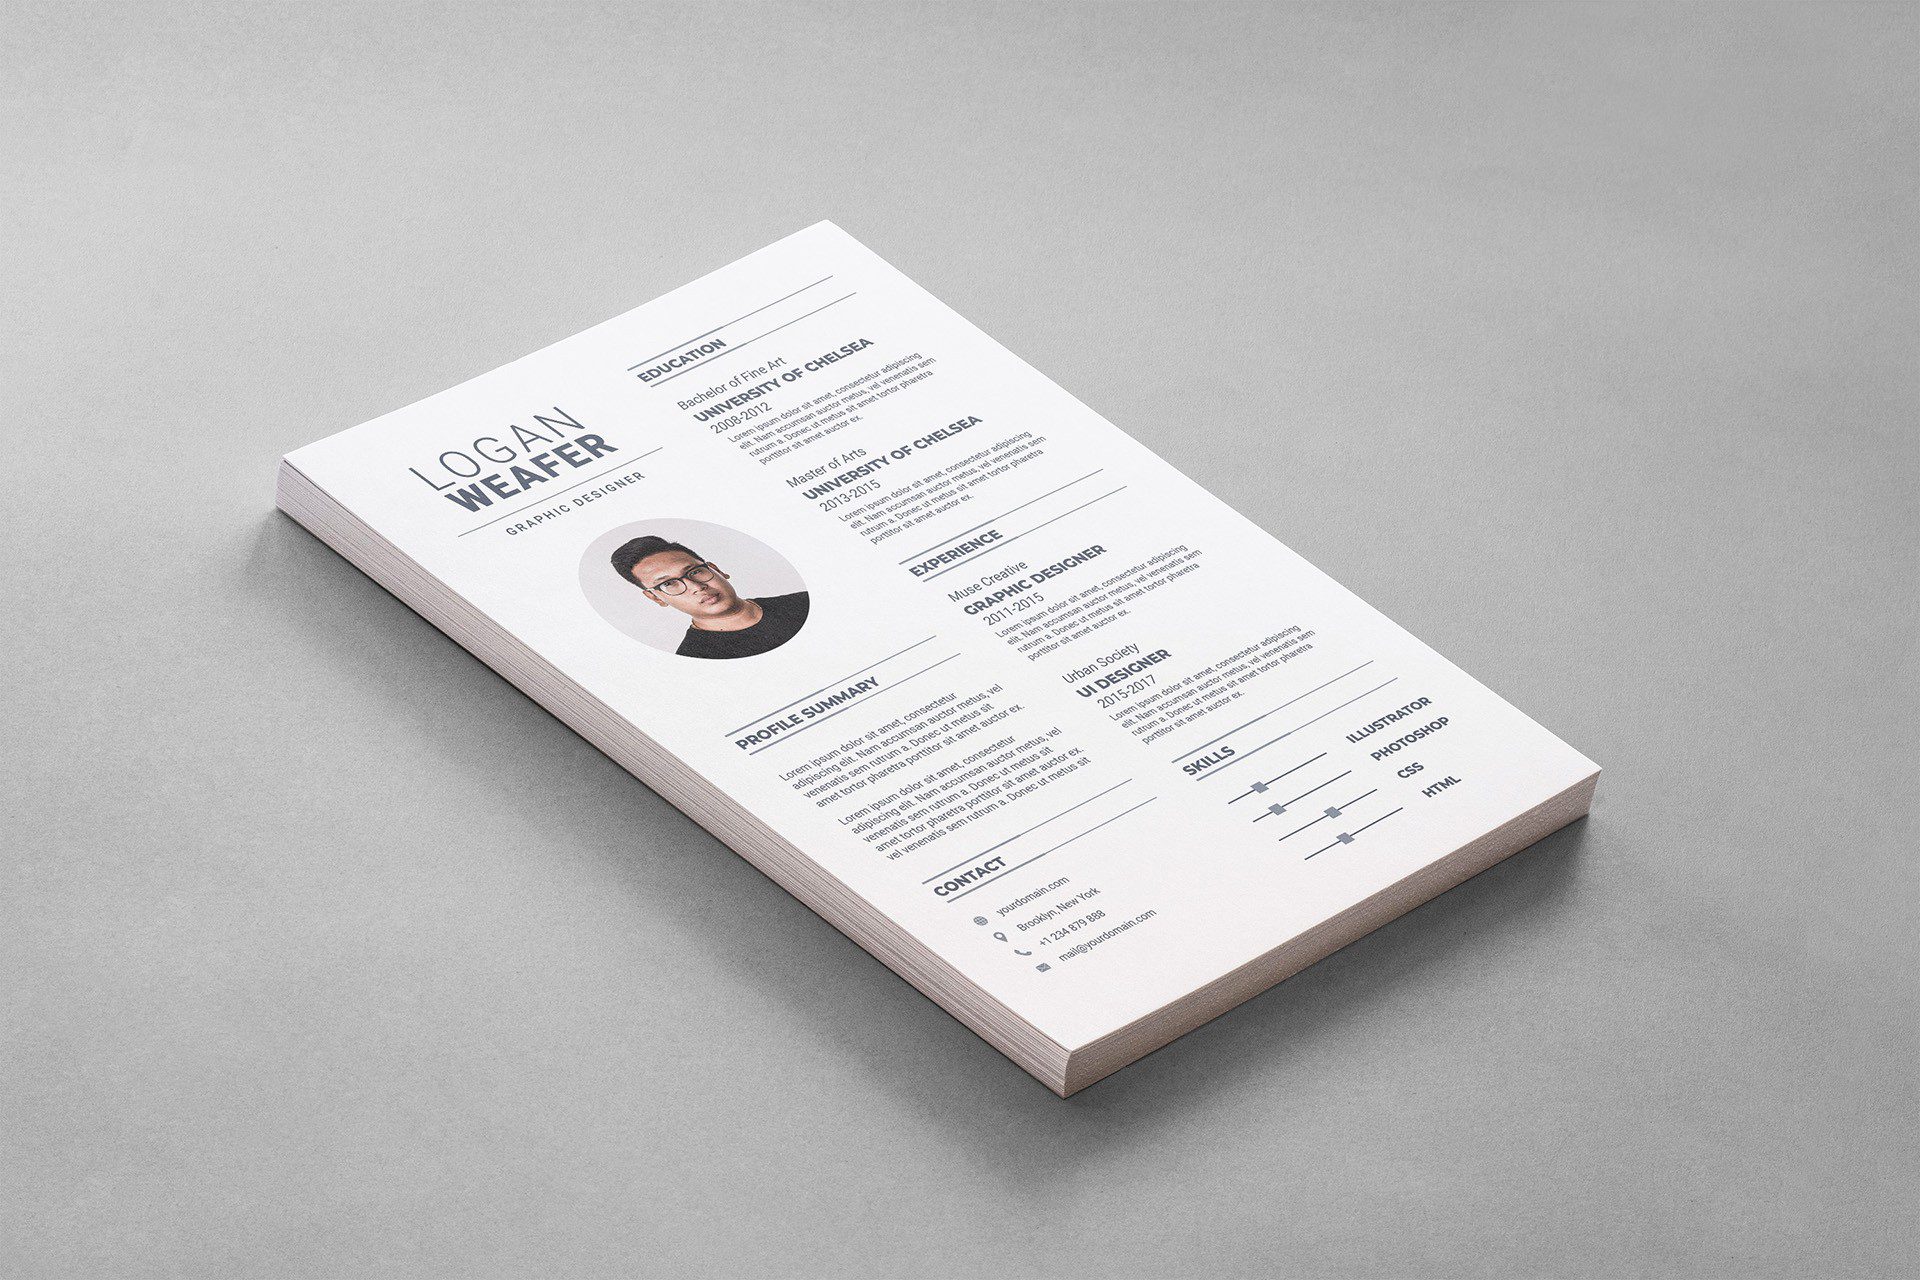
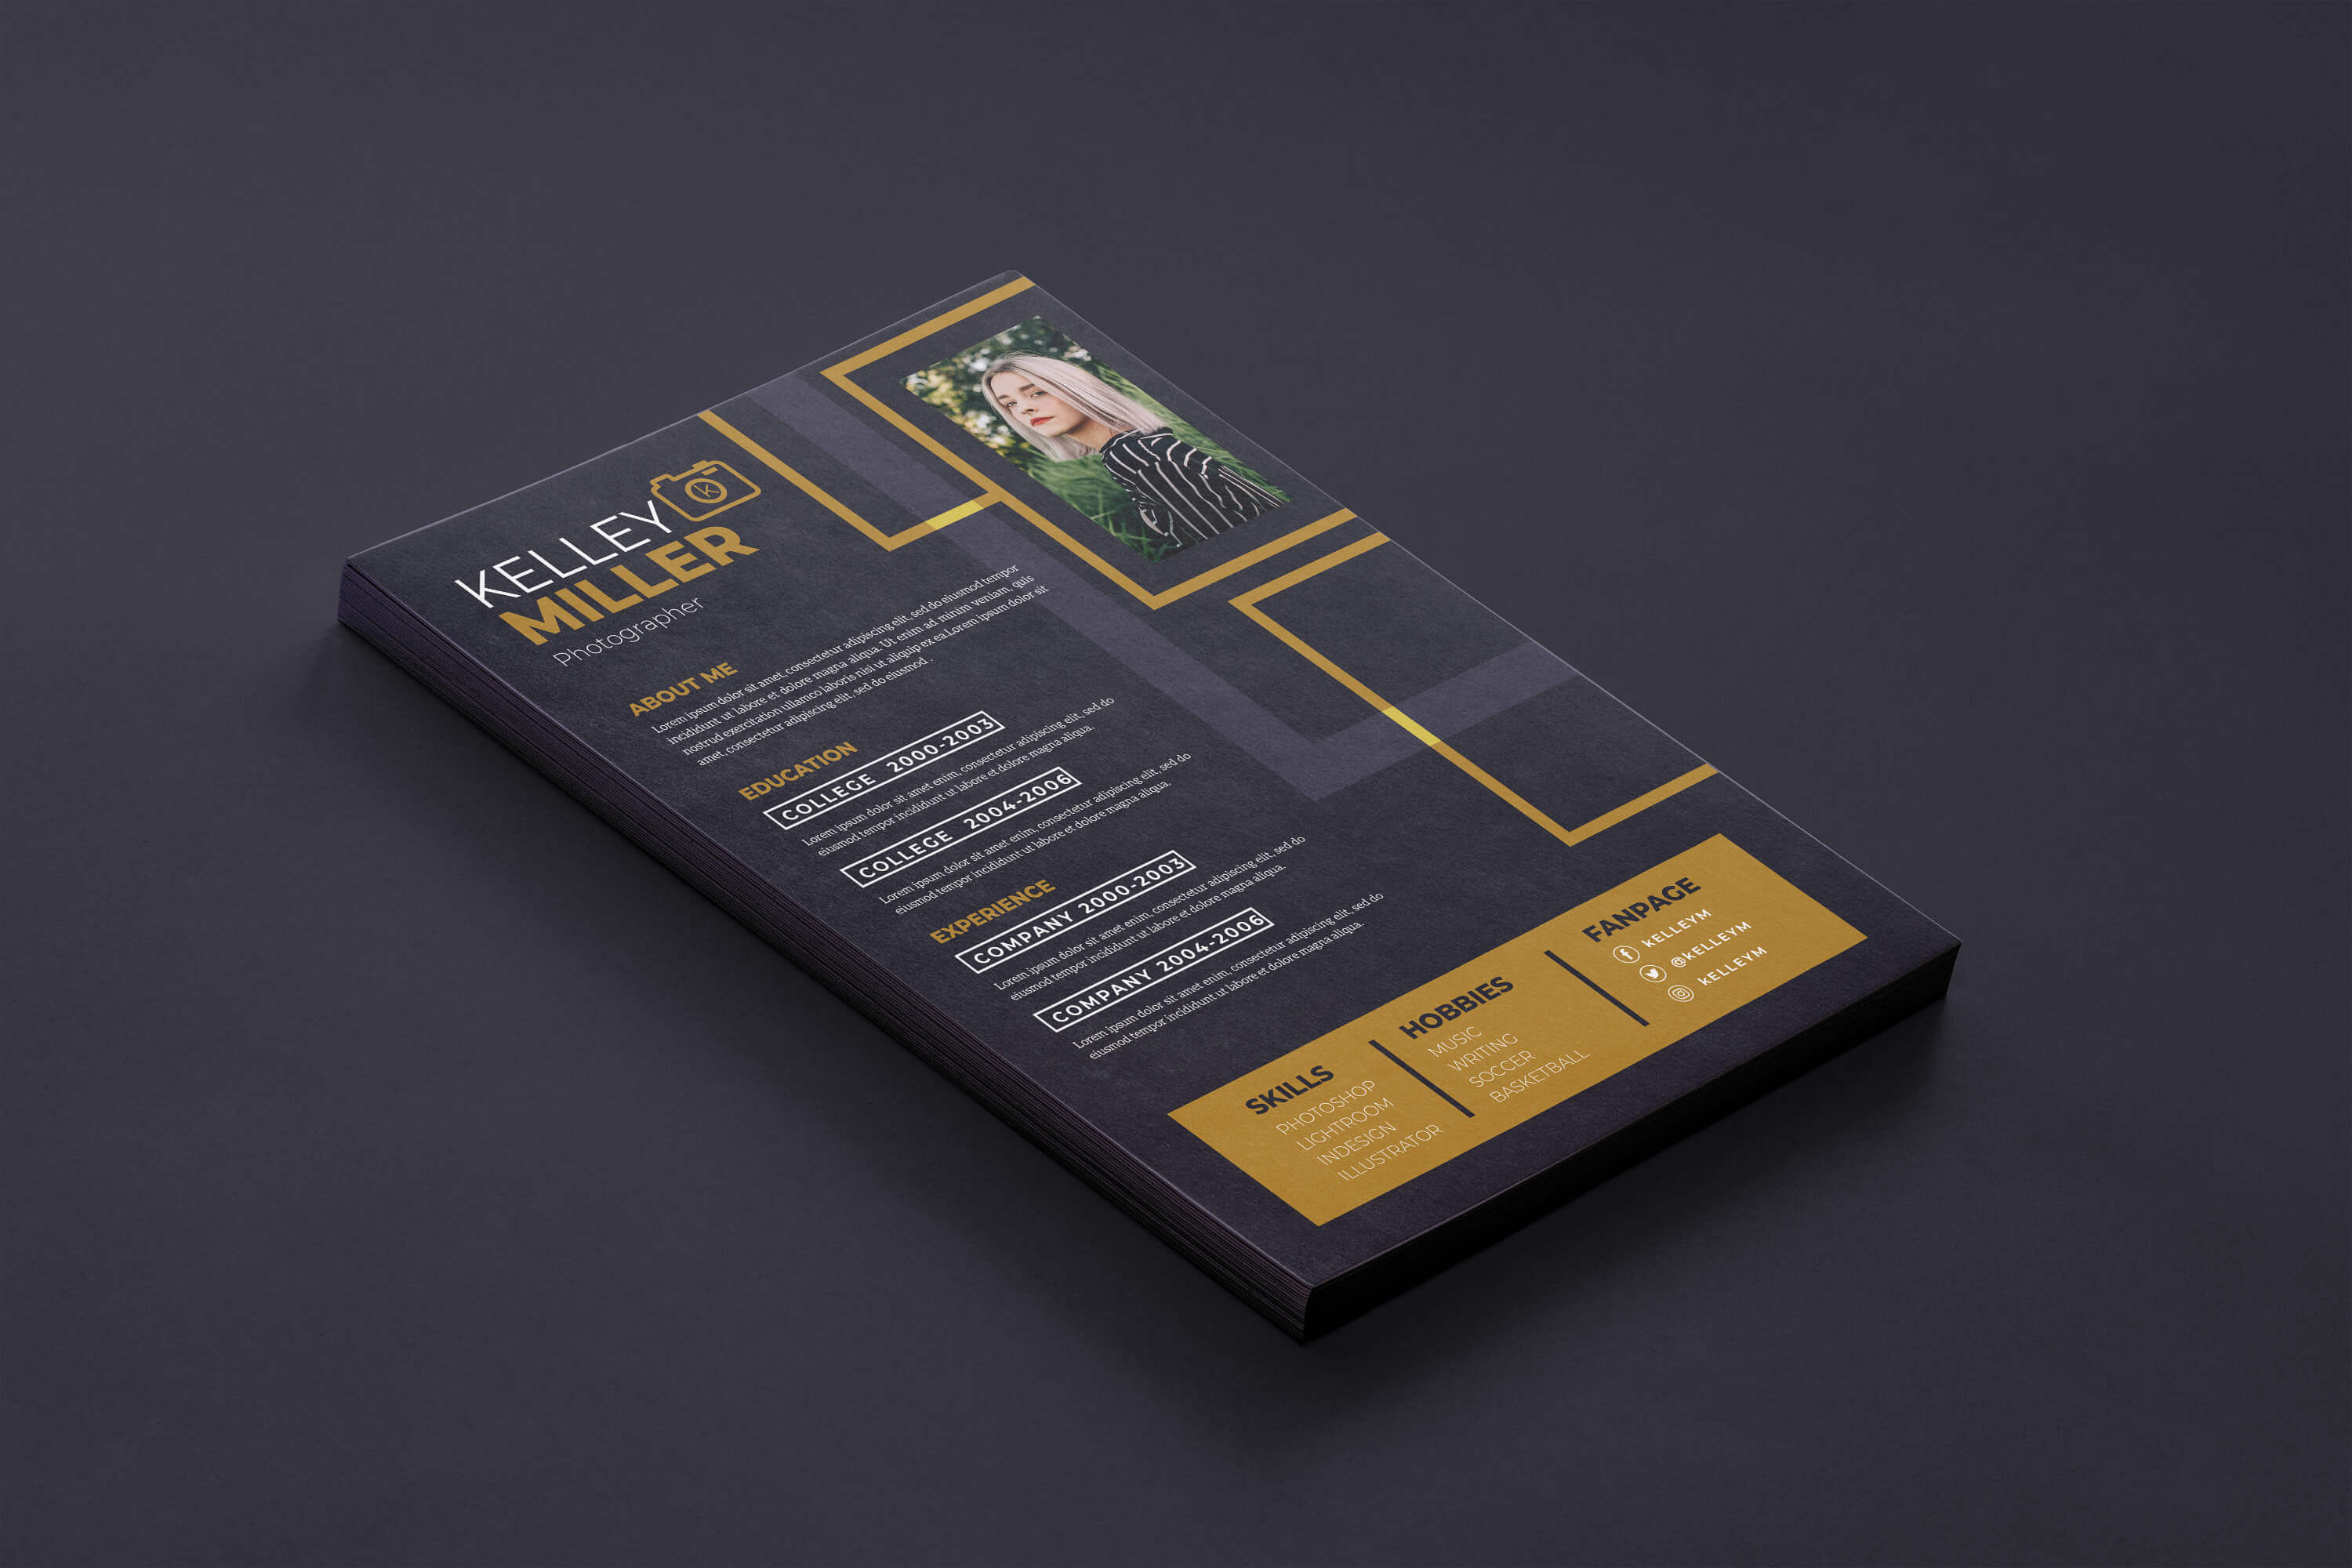
Here’s an example of what we’re trying to achieve: the color of the paper stack and background can be changed to any color to match the design and branding colors of a dark CV.
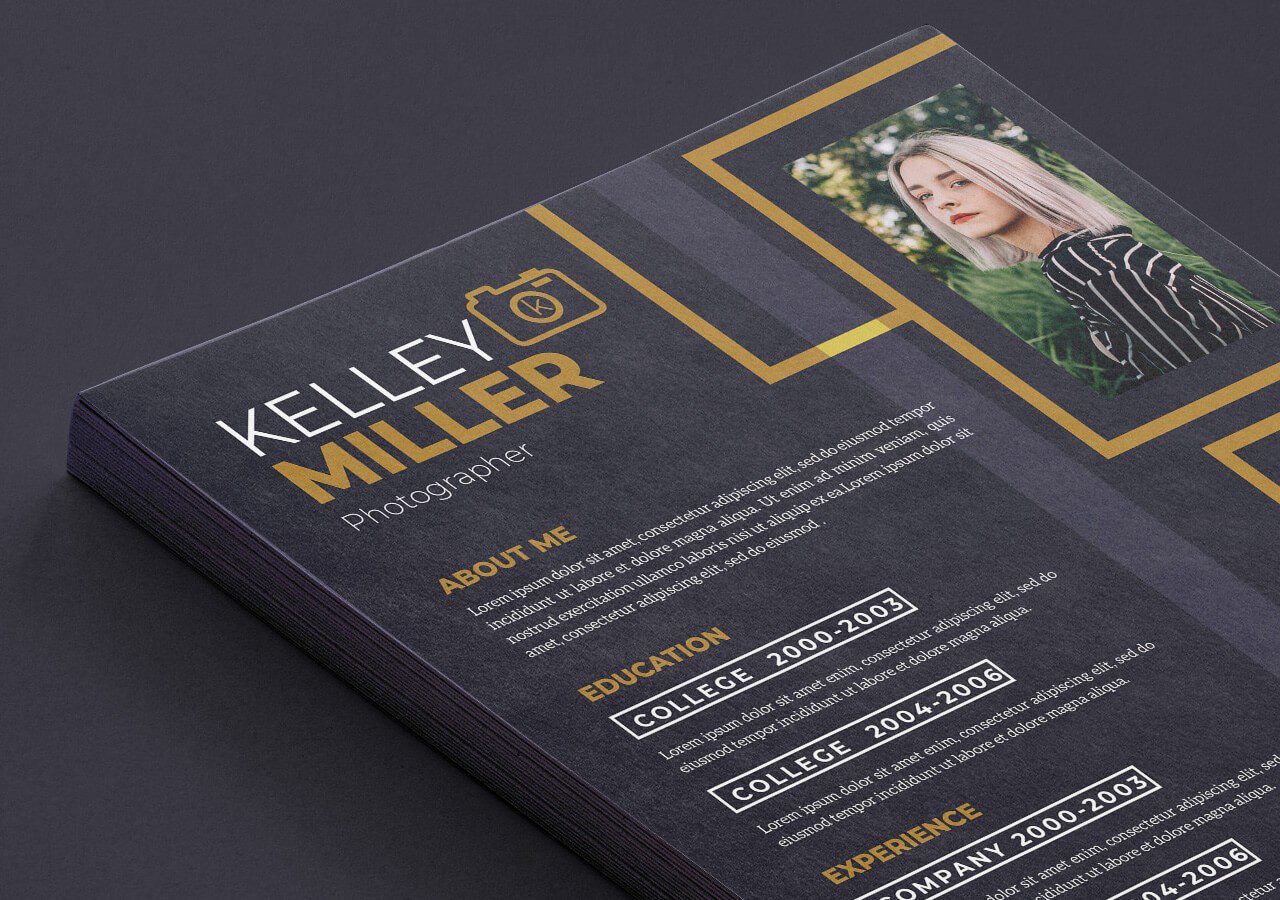
This method can be used to make mostly light colors editable in any photo. It works especially great with white paper, mugs, shirts etc and even red color, because it is necessary to extract shadows and highlights from the object.
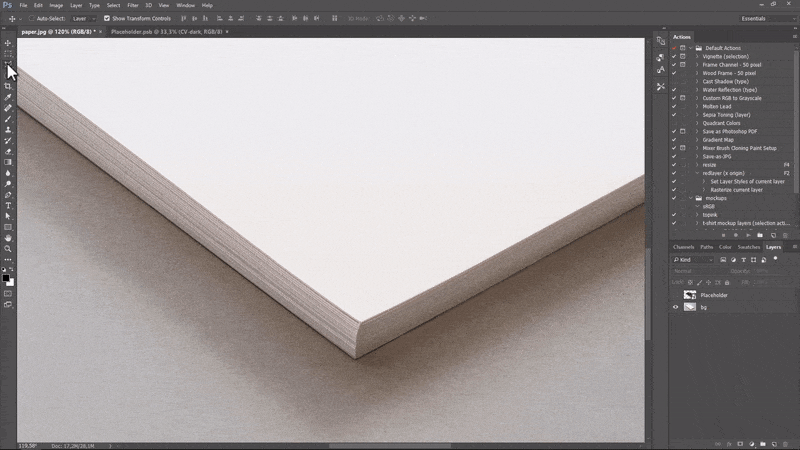
1) Make a Selection with the Lasso Tool
The first step would be separating the background and the mockup object, so we could create color masks and change color of each layer separately.
Use the Use the Polygonal Lasso tool to make a selection around your object.
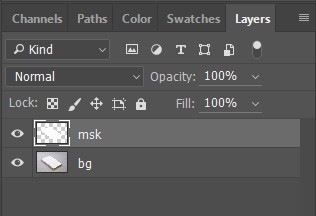
2) Create a New Layer
With the selection active, create a new blank layer, fill it with a solid color, for example white, and name the layer msk (for the PSD action to work)
3) Download and Run a Photoshop Action
Next we’ll use a Photoshop action to separate the Highlights and Shadows and create a Color layer for the object we just cut out.
It is also possible to do all the steps manually without a Photoshop Action, but it will definitely save you a minute or two each time you make a mockup.
The Download includes multiple actions which I’ve created over the years to make the process of mockup creation much easier and faster.
Install Action Into Photoshop
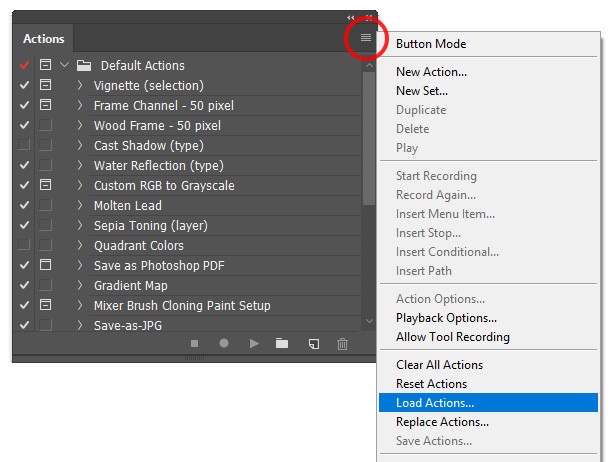
Go to Window-> Actions to open up the actions tab and click the small button at the top right corner.
Click the Load Action and navigate to the downloaded mockups.atn file.
Run the Action
Running a Photoshop action is very simple!
NB: The layers should be named bg and msk for this specific action to work!
Make sure no mockup layer is active or selected, then choose the first action (Shadows/Highlights) and press the Play button.
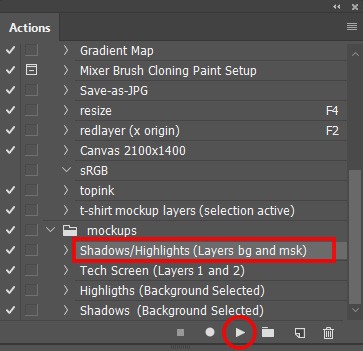
The action will:
- Create a new layer for Highlights (Blend Mode Screen);
- Create a new layer for Shadows (Blend Mode Linear Burn);
- Add new editable color picking layer;
- + lots of masking, renaming and setting blend modes.
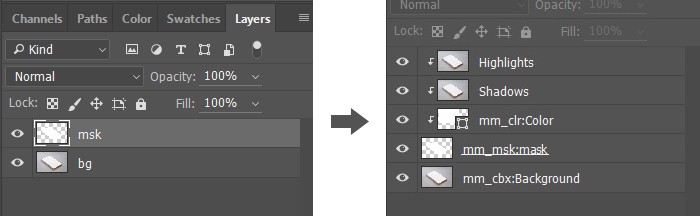
Don’t worry: the original background layer will be untouched (only renamed)!
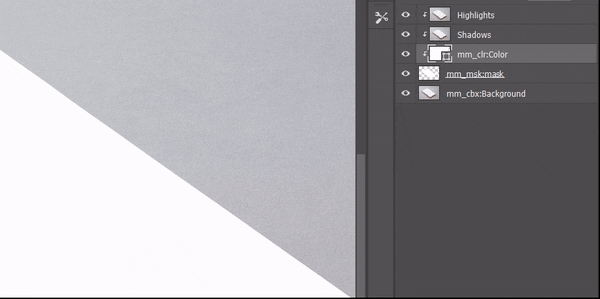
After running the action, your layers tab should look like the following:
4) Customize Shadows and Highlights
While Actions are a great way to speed up your workflow, they won’t do all the work 100% for you – this step is specific for each mockup and depends on the image you are using, the eye is the king here!
Our goal is to change the Shadows and Highlights layers correspondingly so that when we choose the mockup object (or background) to be white, then it will be white with proper shadows, and if you would like it to be black, then it still looks good with enough highlights on it.
This is why it is important to separate Shadows and Highlights into different layers, so that the mockup looks good with both a light and dark placeholder.
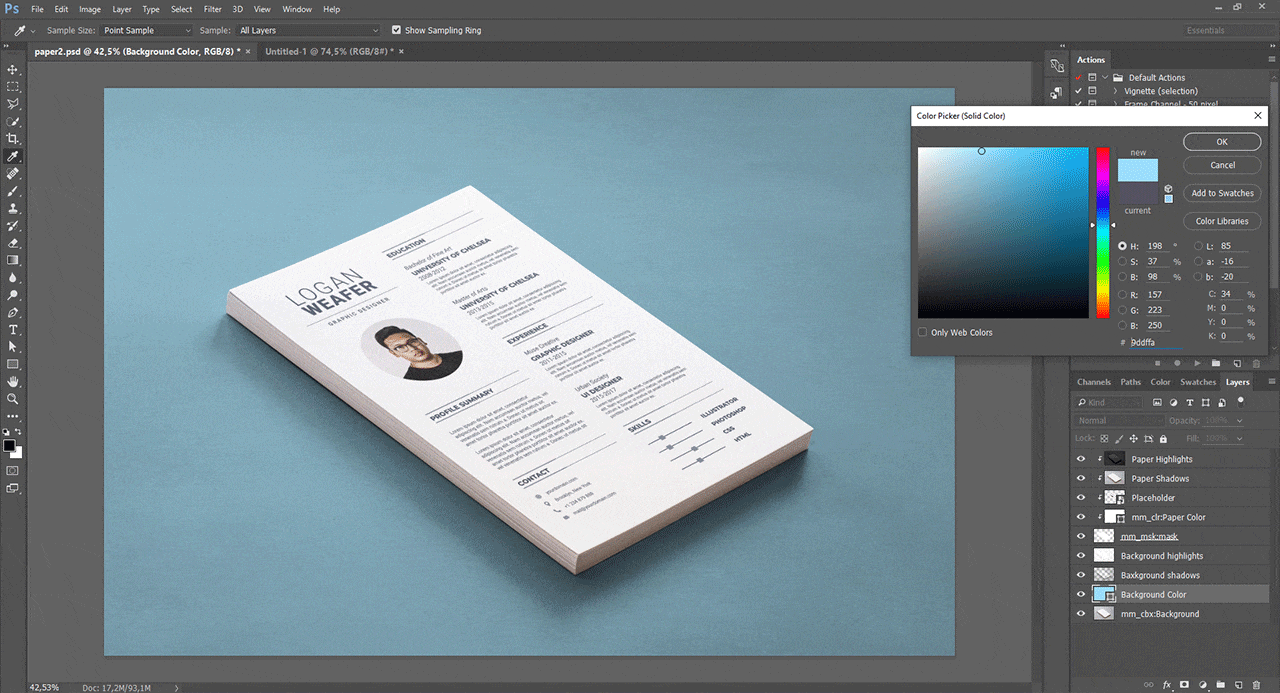
First let’s make sure that the color layer mm_clr:Color is in the correct position and size, so that it covers the entire paper area. Changing the color of this layer will eventually change the color of the entire mockup object, so it is important to check whether the action didn’t create a too small layer.
Make the layer active by clicking on it and the borders will indicate the layer size.
If the layer is too small, simply resize the color layer (CTRL+ T) to make sure it covers the entire paper area.
Since the color of the paper is practically white with some shadows on the edges (which is perfect), then in this example it is not necessary to tweak the Shadows layer – let’s move on correcting the Highlights layer.
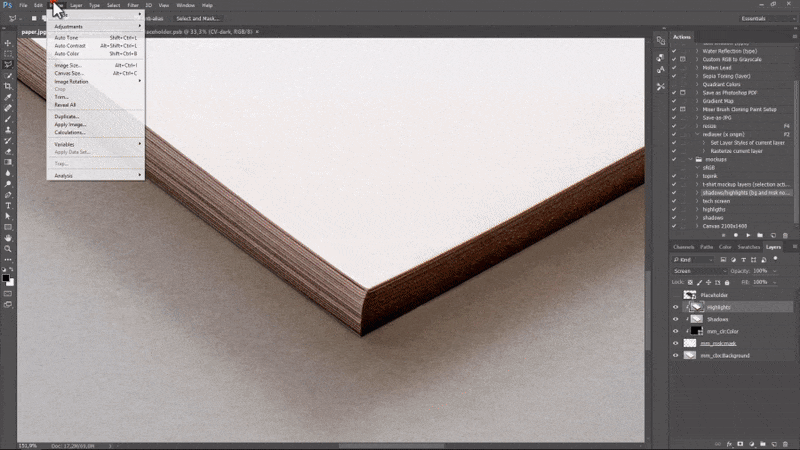
Change the Color layer to black by double clicking on the color box area.
This should make our entire paper stack black, but it didn’t… why?
It’s because the highlights layers contains too much white color from the white paper. We need to adjust the Highlights layer to reduce the amount of white.
There is no right or wrong here, it is all matter of experimenting and finding out which settings apply best to your mockup photo.
Adjust the Curves, Levels and Brightness/Contrast of the Highlights layer to reduce the highlights while bringing out the black color. The process is also the same for the Shadows layer.
NB: make sure to Desaturate (Image -> Adjustements -> Desature) the Highlights layer first to better see all the details.
You can constantly preview the edits and once you have completed the edits, the paper will look realistic with both shadows and highlights, no matter which color you choose.
Now that the paper of the color stack is editable, then you can insert a CV with any color and change the color of the paper stack to match the design.
4) Change the Background Color
We can also use the same process to make the background color easily editable in the mockup.
While extracting the Shadows and Highlights data from the background it is usually not so important to go into as much detail and fine tuning as we did with the mockup object.
For example on the mockup object like the paper stack or a t-shirt, it is important for the paper to look clear and white, however for the background, which is usually more of an abstract layer, the color of pure white could be a bit more gray, black could look a bit a more lighter etc.
So in order to save time let’s use the 2 other actions which were included in the download.
These actions will not create a bunch of new layers, but instead they will simply extract the Shadows or Highlights from the selected layers, and keep the original layer unchanged.
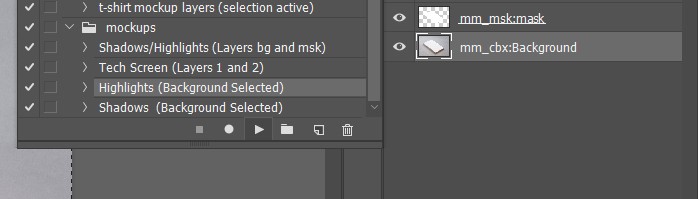
- Select the background layer, and play Shadows action
- Select background layer again, and play Highlights action
Now you just need to add one more layer… that’s right, the color layer for actually changing the background color.
Click the new layer icon and choose Solid Color
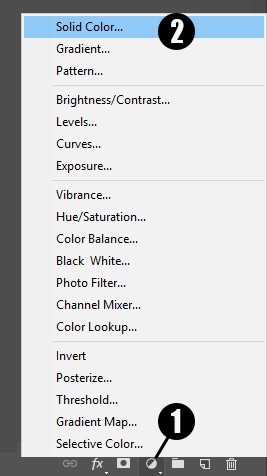
Choose a color for the layer and then play with the Opacity settings of the Shadows and Highlights layer to find the perfect balance (so that your selected color will become visible)
5) Add New Background Image
Editable Background color is a great option, but now let’s turn it up a notch and replace the background color layer with a real photo, which will also become a placeholder.
I’ll use a dark wood image, but there are hundreds of free backgrounds you can download from Pixabay.com.
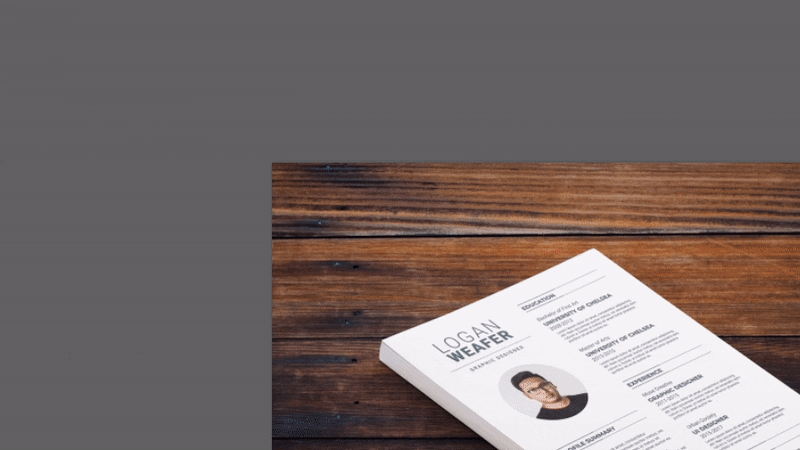
Insert and Properly Scale the Background Image
Drop your image into the mockup scene, just like we did before…
however don’t press enter and don’t Rasterize the layer just yet!
This time we actually need a larger image, because unlike the placeholder for your mockup image, the background usually covers the entire mockup scene and even extends outside the visible areas.
That’s why the placeholder for background needs to be larger than the mockup size itself.
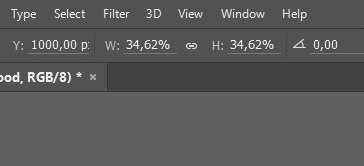
Once the image is added into your scene as a new layer, Photoshop will automatically make the Transform menu active, so you can set the size.
Set the scale to 100% in both width and height.
Now press Enter, then Rasterize the layer and convert it back to a Smart Object again.
This step was necessary because otherwise you might end up with a layer which is a smart object, but the content is not editable, because it is linked to the original image file…
and if the 100% background size was too big for your mockup, then you can always make it smaller, e.g choose 80% instead of 100%
Distort Background
Next use the Distort tool to move the new background layer into the correct perspective and position.
Now that the background is in place, then you can also experiment with some other background images or different materials, by replacing the content inside background smart object.
Here are a few examples with different types of wood background:
Download Final PSD Mockup File
Didn’t have enough time to follow this tutorial? No problem… simply download the example PSD mockup and explore the file yourself. The file includes all the color layers and a placeholder for adding your own background photo or pattern.
Play with the mockup and see how each layer affects the layout and overall looks of the mockup template.
Conclusion
That was it! After completing this tutorial I can call you a true professional in making Photoshop mockups! You have all the knowledge about:
- making a mockup using Photoshop smart object;
- distorting and warping the placeholder;
- using Photoshop actions;
- advanced color changing techniques;
- adding new backgrounds to a mockup.
The technique described in this article is perfect for creating a photo-based mockup of a book, magazine, brochure, bag, CV, business card, t-shirt, greeting card or coffee mug.
Now I challenge you to create the very first mockup on your own!
If you have questions about any of the steps covered in this mockup tutorial or you think I should describe some things more clearly… please let me know in the comments section below and I will answer all comments within 24 hours.
I will also gladly make adjustments or improvements to this post, if you feel some explanations or steps were not clear – your feedback is much appreciated!
Frequently Asked Questions
What exactly is a mockup and why should I use one?
A mockup is a realistic, high‑quality visualization of your design—such as a logo, app interface, or print layout—placed within a real‑world context (e.g., on a t‑shirt or smartphone screen). They help you present polished visuals to clients or users, boost engagement on social media, and reduce design uncertainty.
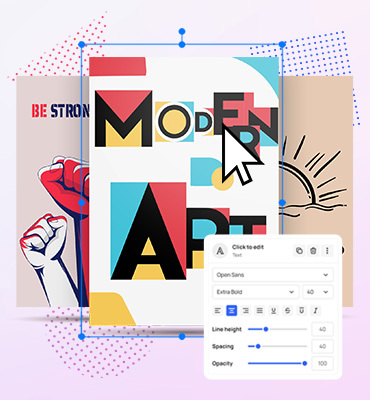
What’s the difference between a mockup generator and a Photoshop PSD mockup?
A mockup generator is a browser‑based tool where you can drag, drop, crop, change colors, and disable layers directly onscreen—no Photoshop needed. A PSD mockup is downloadable and editable in software like Adobe Photoshop and offers advanced edits if you prefer full design control.
Can I customize individual layers in my mockup?
Yes! Most templates let you:
- Replace placeholder layers (e.g., images on a mug or device screen)
- Change colors (e.g., t‑shirt color or background shade)
- Toggle shadows or effects
For more advanced edits—like adjusting individual layer elements—you can download the PSD and edit it directly.
Are my mockup designs usable for commercial projects?
Absolutely. Once downloaded, mockup visuals from MediaModifier—even from a free trial—can be used commercially, though free versions often include watermarks or lower resolution.
What features should I look for in a mockup tool?
Prioritize:
- A broad, regularly updated template library
- Easy drag‑and‑drop with cropping functionality
- Custom layer control (colors, shadows, visibility)
- Export options in PNG, JPG (and PSD if needed)
- Cloud‑based workflow with device/browser access
How do I get started creating a mockup?
- Choose a template that matches your design context.
- Upload or drag your image into the placeholder.
- Crop/reposition as needed.
- Customize colors or disable layers.
- Download your design in your preferred format.
Can I save multiple versions of a mockup?
Yes, many tools let you save draft versions. You can edit multiple variations (e.g., different color schemes), save them, and return later to download or refine them further.
Do high-resolution mockups take longer to render or cost more?
High-res mockups can be slower to load or require subscriptions. For fast previews, tools offer free, watermarked versions. Paid subscriptions unlock full-quality, watermark-free files and faster performance through optimized templates and caching.
Related articles
Visualize your design Use a product mockup to showcase your design
Create your design Use our templates to create delightful designs for any medium