How to Easily Create a Custom T-Shirt Design in 3 Steps
Are you eager to create a custom t-shirt design that perfectly expresses your brand, your passion, or simply your sense of style? Custom t-shirts are an amazing way to show personality, market your company, create a feeling of unity at family events or make style statements!
Whether you’re designing for business, events, or personal use, crafting the ideal t-shirt can feel overwhelming without the right guidance.
This article will walk you step by step through the process of designing a t-shirt that stands out so you can bring your creative vision to life with confidence. We’ll show you how to easily create your own t-shirt design and preview what it looks like on a mockup before being sent to the store to print.
Why Create a Custom T-Shirt Design?
Creating a custom t-shirt design is a powerful way to showcase your unique message, personality, or brand. Whether you’re a business owner, an artist, or simply someone who loves original apparel, a custom t-shirt can help you stand out from the crowd.
For companies, branded shirts serve as effective marketing tools that promote brand awareness and create a sense of team spirit among employees. For personal use, they make memorable gifts for birthdays, reunions, or special events.
A well-designed t-shirt is also an opportunity to express your creativity and turn your ideas into something tangible and lasting. No matter your goal, custom t-shirts combine style, identity, and impact in one wearable canvas. So let’s go through the 3 easy steps to create your custom t-shirt design!
1. Decide on an aim for your t-shirt design
Are you creating the design for corporate branding, celebrating your birthday, wear a personalized joke design, or have your favorite photo on your shirt? The aim for your shirt will probably define the type of design you need.
If you need some inspiration, you can browse existing designs here.
2. Get creative and create your design
Now that you know what you want, it’s time to get creative! Let’s cover the different options.
- Edit an existing design
- Create a t-shirt design from scratch
- Use a photo
Edit an existing design
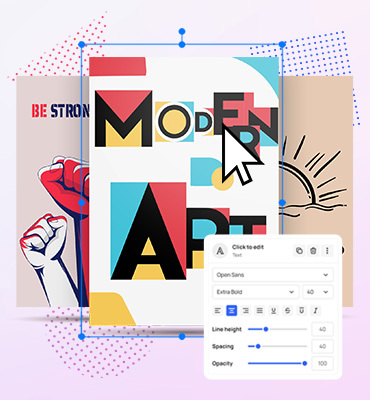
Did you find a Mediamodifier design you liked? Great! This is by far the easiest way to personalize your image. Just click on the design and use the editing tools to make it your own!
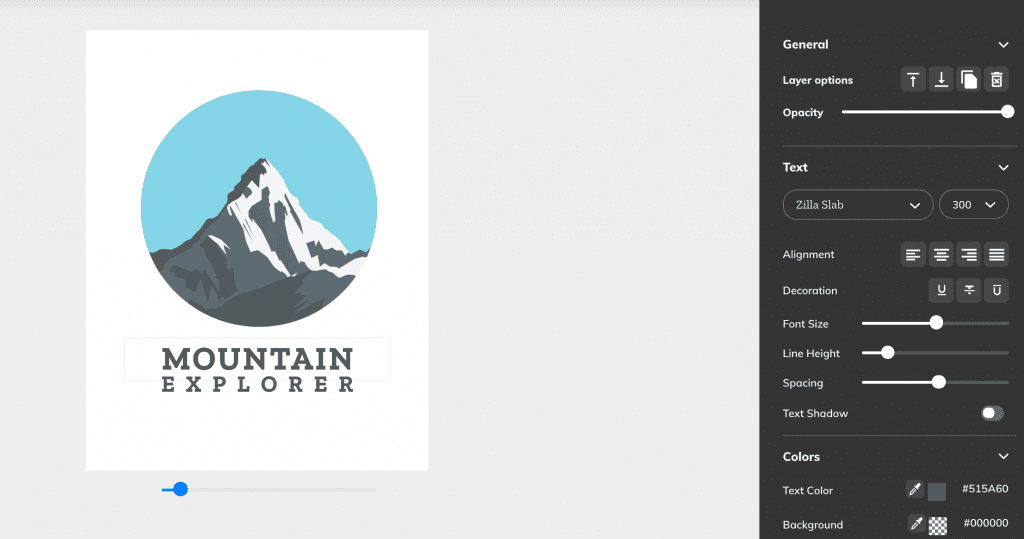
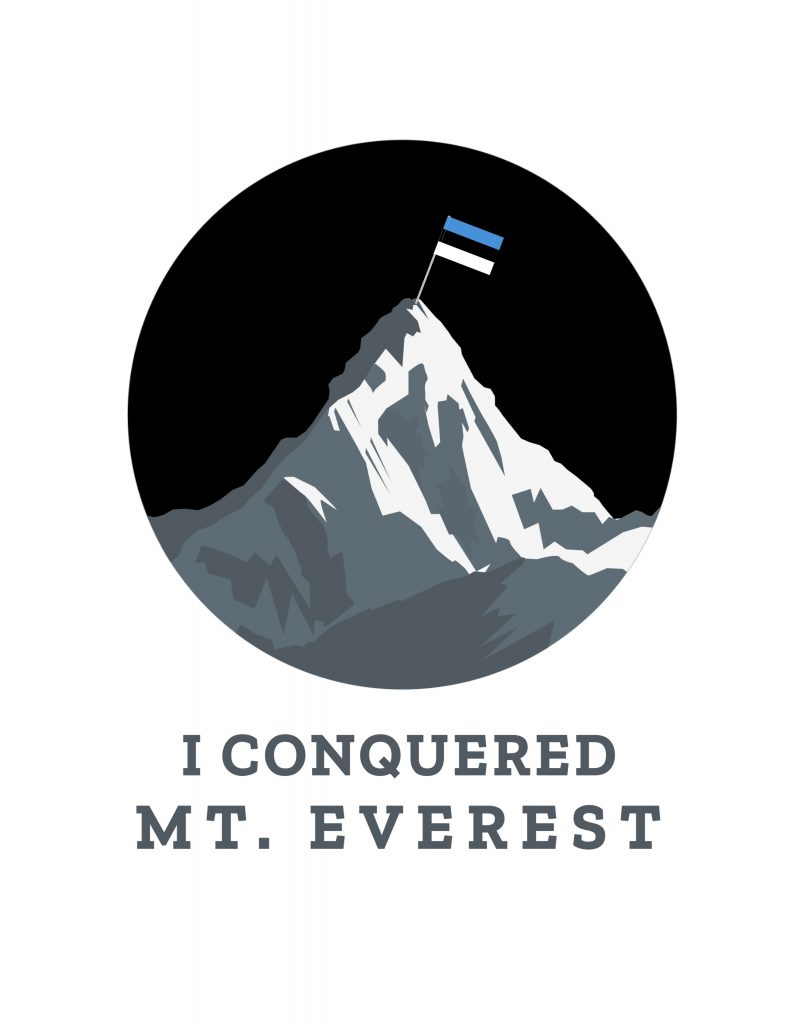
Here’s an example. I saw this Mountain Explorer template and as my friend is going to climb Mt. Everest in a couple of months, I thought I’d create an “I conquered Mr. Everest design”. The text and all the colors are editable, so go nuts!
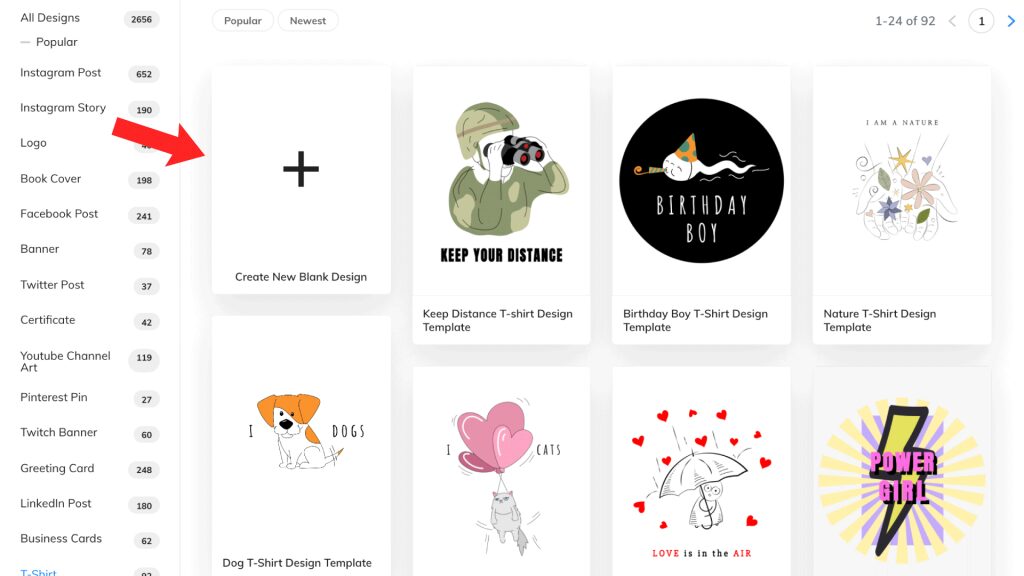
Create a t-shirt design from scratch
Have something specific in mind or want to add text to an existing photo? Click on “Create New Blank Design” and choose a vertical format. We recommend something like 1500x2000px or 2500x3200px.
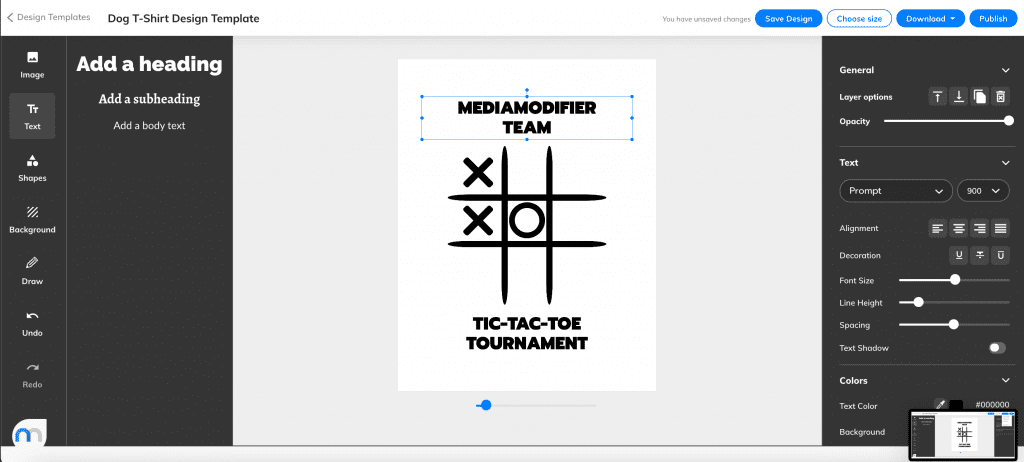
Then, you’ll see a blank canvas. On the left, there’s a toolbar where you can find stock images, fonts, shapes and a pen tool that you can use to draw whatever!
Once you’ve added something to the design, you’ll be able to resize, arrange, duplicate and change the colors. All of those options are on the right of your design. The world is your oyster!
When you’re satisfied with the finished look, download your masterpiece by clicking on the top right button. We recommend using a transparent background as that can be used on any color t-shirt. Of course, if your t-shirt is white, the background can be white as well.
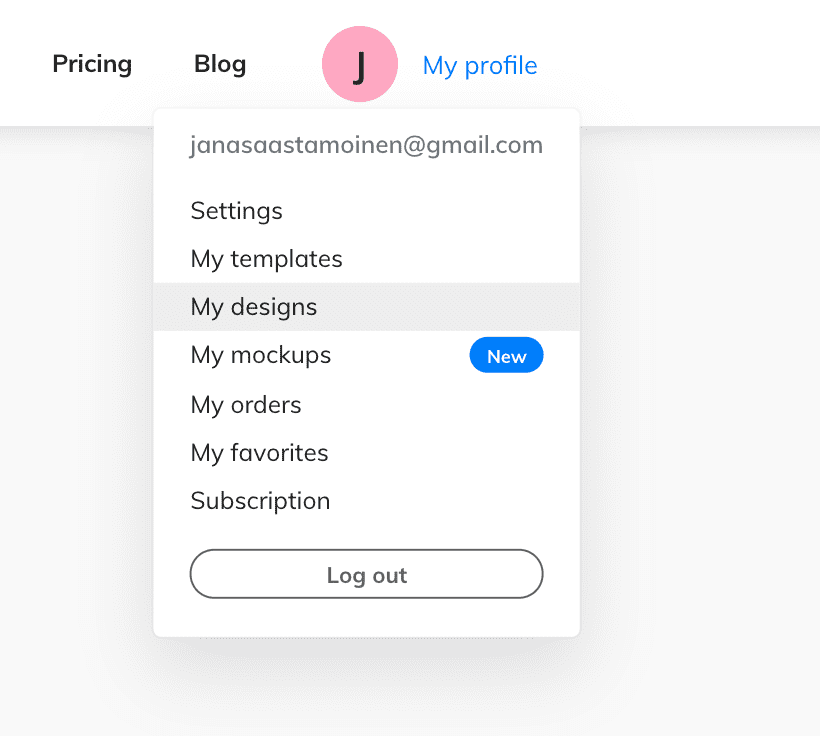
If you want to continue working on it, just click “save design” and you can come back to it later. To access your saved designs, you’ll need a Mediamodifier account. Click on “My profile” in the top right, then “My designs” and there they are.
Use your own photo
If all you want to add to your t-shirt design is a photo and you don’t want to add any design elements, you can head straight to step 3: create a mockup.
3. Create a mockup of your design
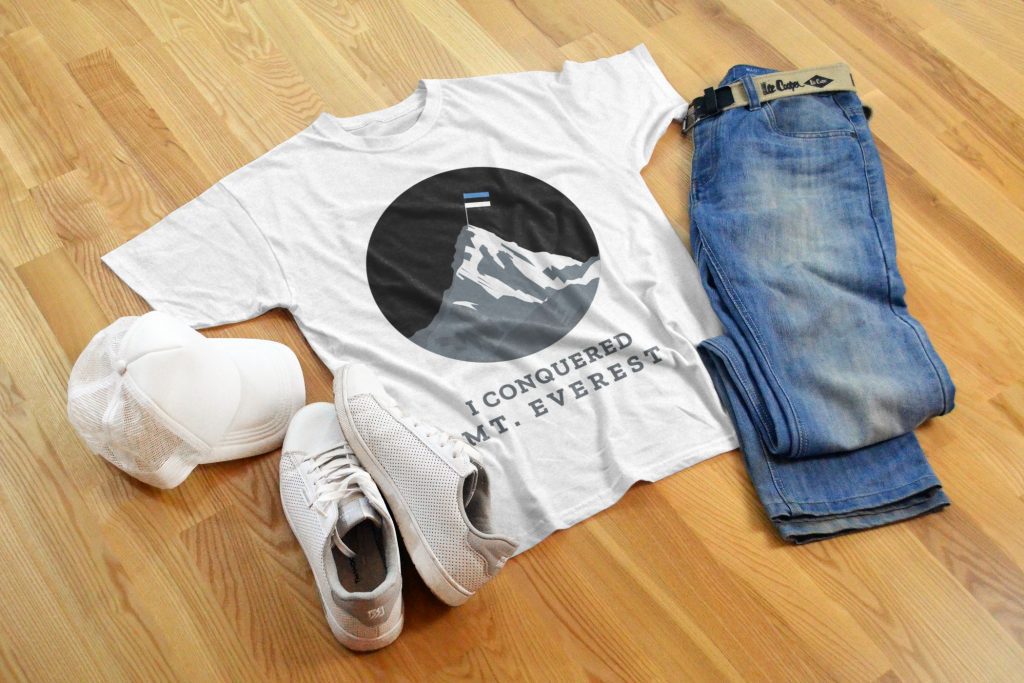
Before printing your customized t-shirt, consider testing your design on a mockup. This is the best way to figure out the size and placement of your creation to avoid surprises in the printing store.
Choose the design that best suits you from 300+ options here. We’ve got everything from just the t-shirt to what it would look like on different people with different outfits.
Need to see what it would look like under a sweater or if you pretended you were superman? We got you.
When you open the perfect mockup, you have two ways of adding your photo. Either click on the t-shirt itself or the “add your image” button in the menu.
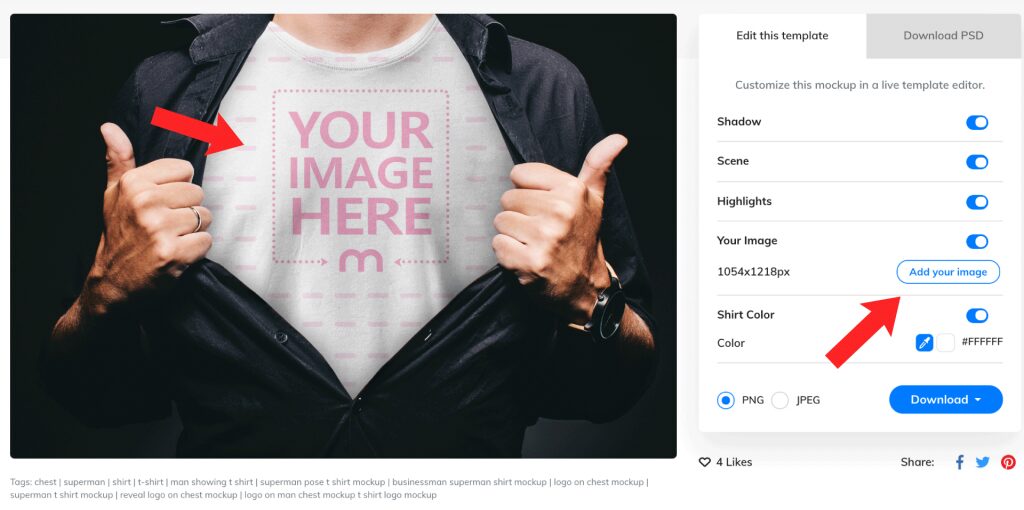
That’s it! Your design is now on the selected t-shirt. You can now see if you need to make any size or placement changes or if it’s ready to be sent to the t-shirt store as is.
Here are a couple examples:


And we’re ready to go print!
Tips for Choosing the Right Colors, Fonts, and Images
The visual elements of your design can make or break the final result, so it’s important to choose wisely. Start by selecting colors that align with your message and evoke the right emotions. For example, bold colors like red and orange convey energy and excitement, while blues and greens feel calm and trustworthy. Make sure your color palette contrasts well with the shirt color to ensure readability and visual impact.
When it comes to fonts, pick styles that match the tone of your design. Clean sans-serif fonts work great for modern, minimalist looks, while handwritten or decorative fonts can add personality and flair. Avoid using too many font styles in a single design — sticking to one or two creates a more cohesive appearance.
Finally, choose high-resolution images or illustrations that won’t lose quality when printed. If you use icons or logos, make sure they are properly licensed and scalable. Before sending your design to production, preview it on a mockup to see how all the elements come together. This extra step can help you catch any alignment or sizing issues early.
Conclusion
Designing your own t-shirt is more than just picking an image — it’s an opportunity to tell your story. With the right tools and a little creativity, anyone can produce a professional, eye-catching design.
Ready to see your ideas on a real shirt? Use MediaModifier’s T-Shirt Mockup Generator to visualize your design instantly and make your concept come alive today.
Frequently Asked Questions
How do I create a custom t-shirt design for free?
You can start by using free online design tools and mockup generators to create and preview your t-shirt before ordering.
What software is best for designing t-shirts?
Popular choices include Adobe Illustrator, Photoshop, and user-friendly online editors like MediaModifier.
Can I sell my custom t-shirt designs online?
Yes, many platforms allow you to upload and sell your designs through print-on-demand services.
What resolution should my t-shirt design be?
Aim for 300 DPI resolution to ensure crisp and high-quality prints.
Related articles

Visualize your design Use a product mockup to showcase your design
Create your design Use our templates to create delightful designs for any medium