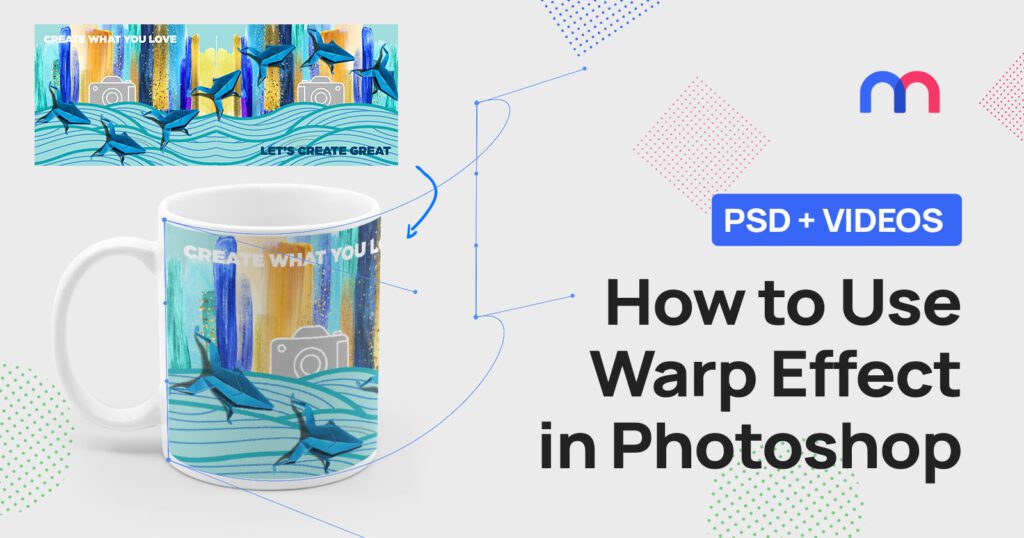
Using the Warp Effect for Mediamodifier Mockups
Creating a realistic mug mockup in Photoshop can be a difficult task.
The warp effect can be hard to master, but the result must always look realistic…
and that is especially true for cases, when these mockups are actually used when displaying real things, like mugs for sale.
The visual representation of the mug must be close to real, otherwise the printed mug will look unnatural and buyers could file complaints, stating that the product was actually not as it was displayed online.
Luckily with Mediamodifier, the creation of online mockups can be easily automated using the mockup API, however the source file for a mug mockup still needs to be done correctly.
We already have an extensive tutorial about formating Photoshop files for uploading to Mediamodifier and using your PSD mockups online, however the Warp effect requires a separate tutorial.
So let’s dig in…
In this tutorial, we will show 2 methods for creating the perfect warp effect for your mug mockups in Photoshop and describe the limits you have.
You can also download all the source files below.
Choosing the right placeholder size
Making a mug mockup usually includes a dilemma – the correct print area file for a mug is usually a wide image, one that wraps around the mug, however it is really hard to wrap like that in photoshop. But a smaller placeholder is much easier to warp warp however that is not the correct print file size…
Not to mention that all mugs and print areas are different.
The below image explains the situation:
(Click here for full size image)
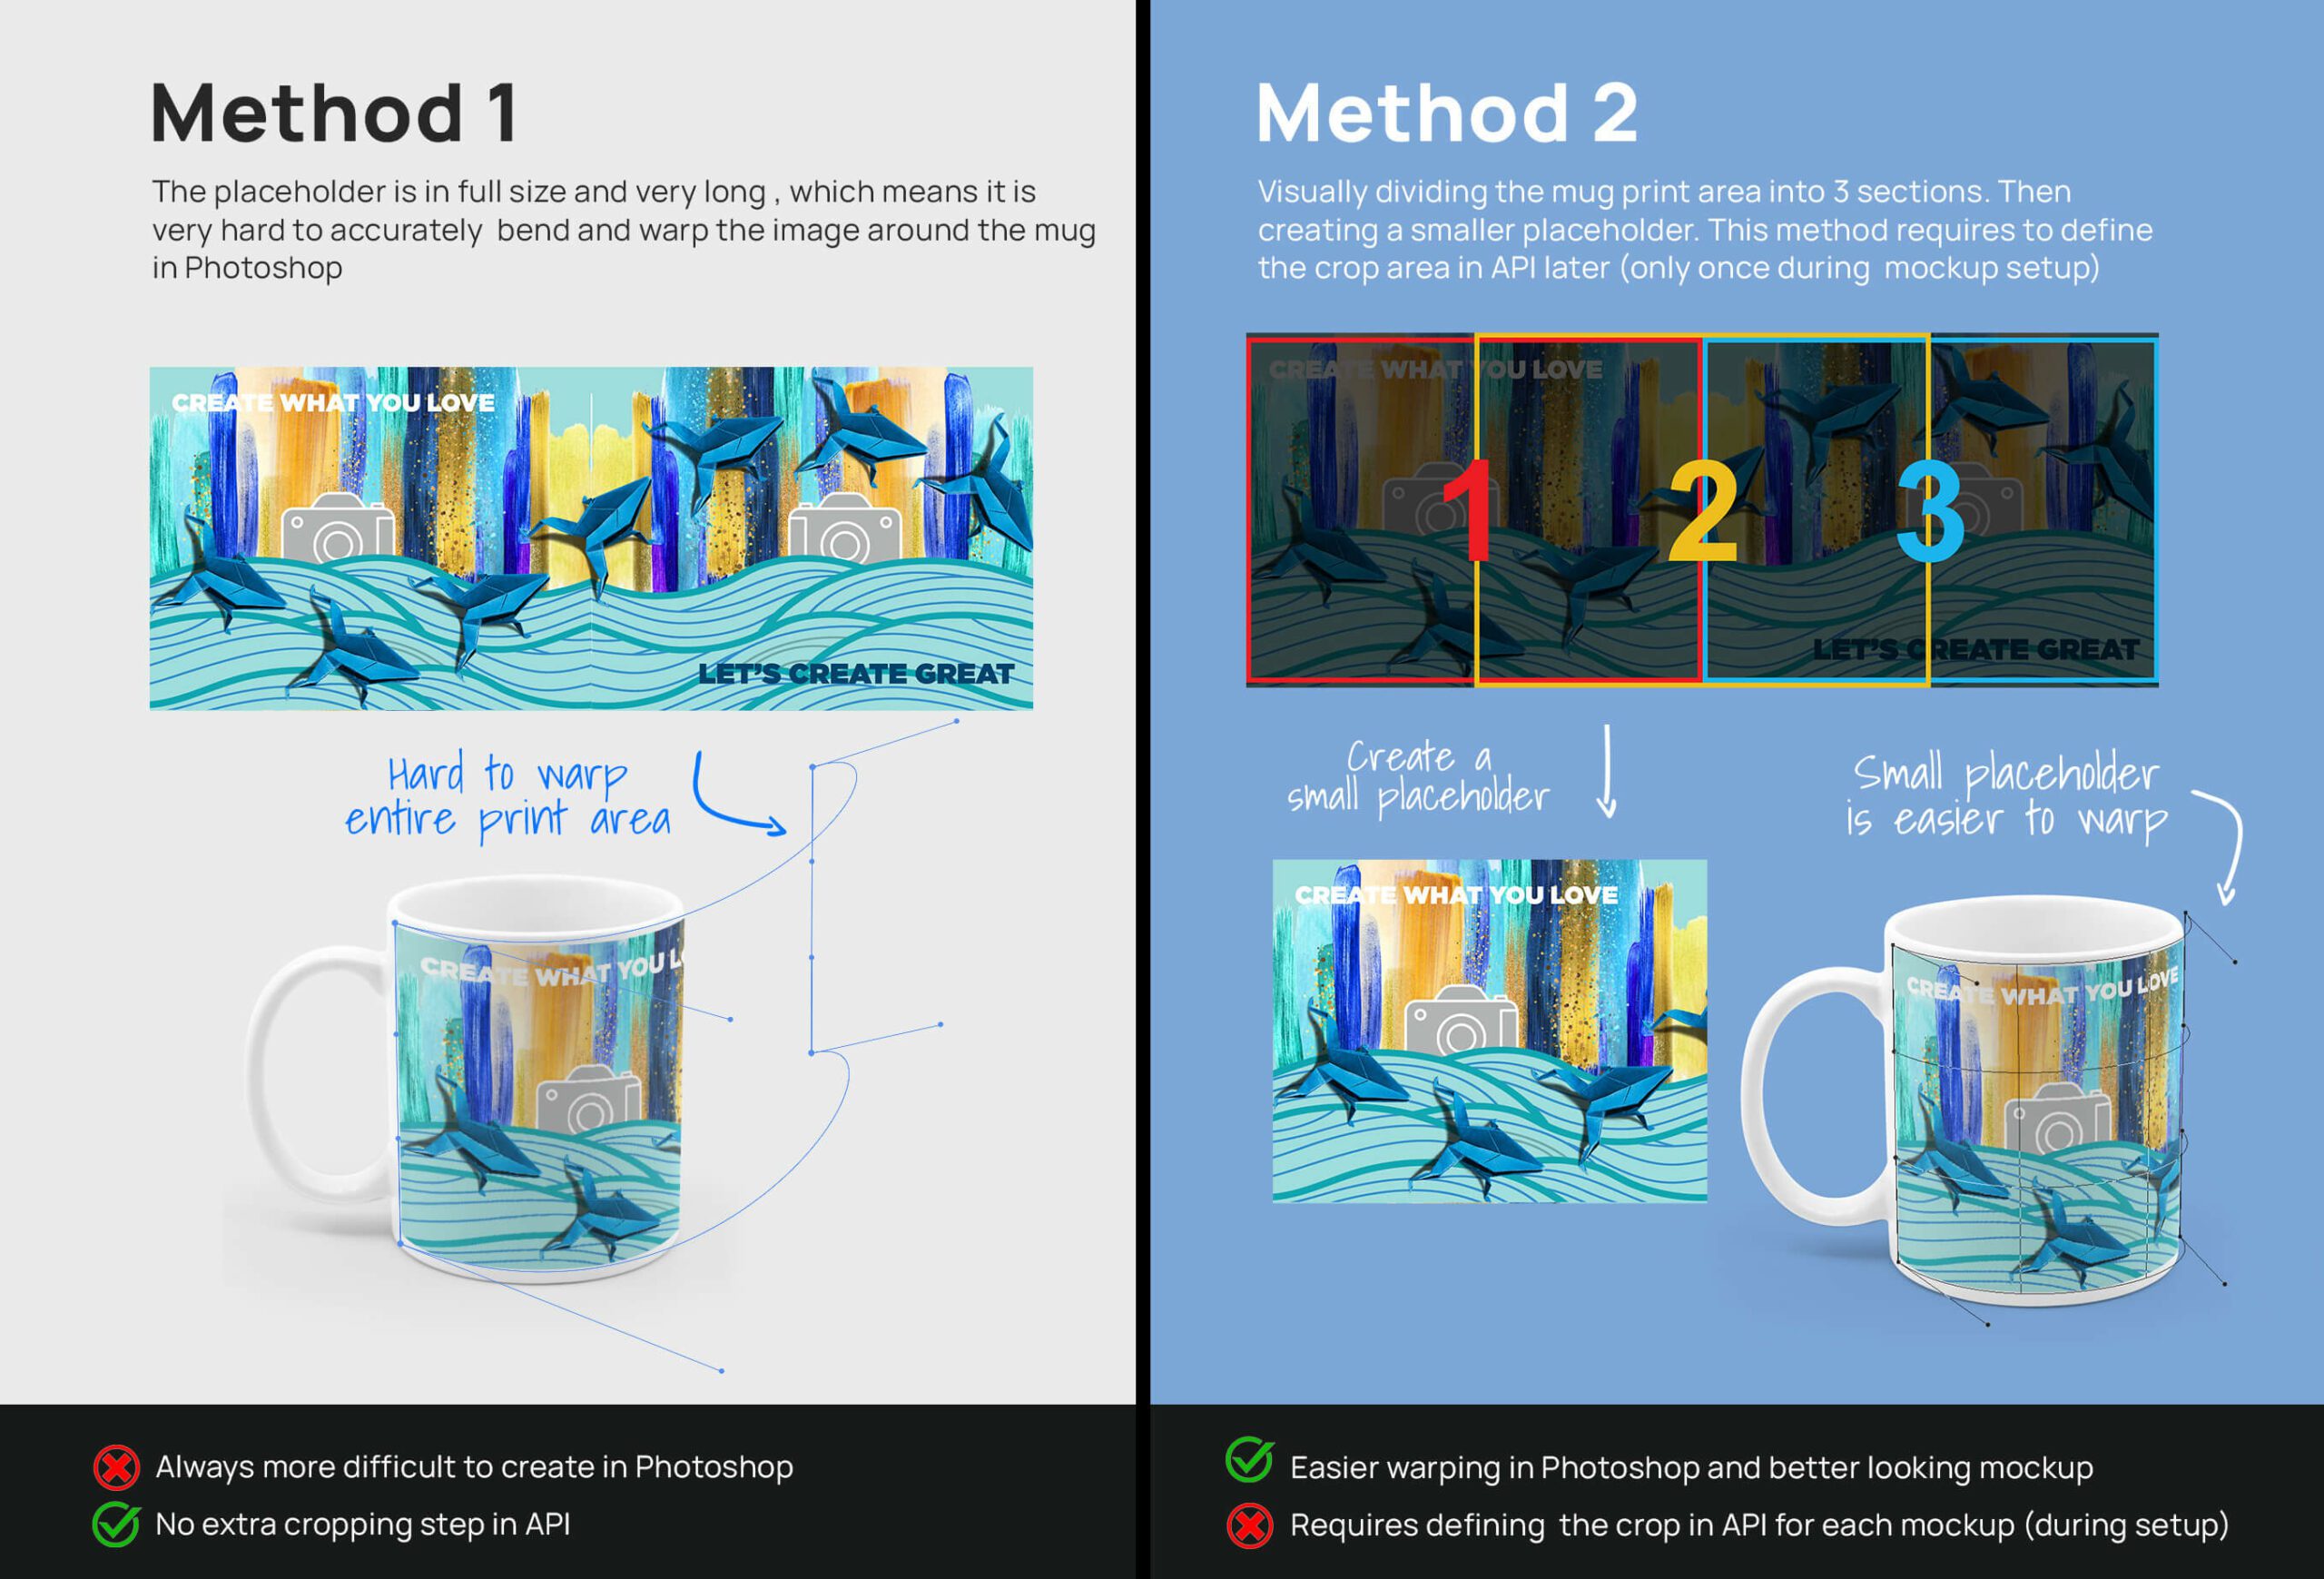
Method #1 – small placeholder
Using smaller placeholders on mockups means that the warp looks way better, more accurate and smoother but requires image cropping on API side (only once when configuring the template). However creating the mockup is much easier in Photoshop.
Method #2 – using real full size placeholder
Using the actual print file size ratio as placeholder = Applying the warp in Photoshop is not accurate and very complicated task, (might even prove to be impossible depending on the angle of the mug) but doesn’t require any cropping setup on API side.
Both methods can be used – it’s just a question of whether there is more work in Photoshop, when trying to bend a very large layer around the mug or with second method a little more work when setting up the mockups for a designs and manually setting the crop.
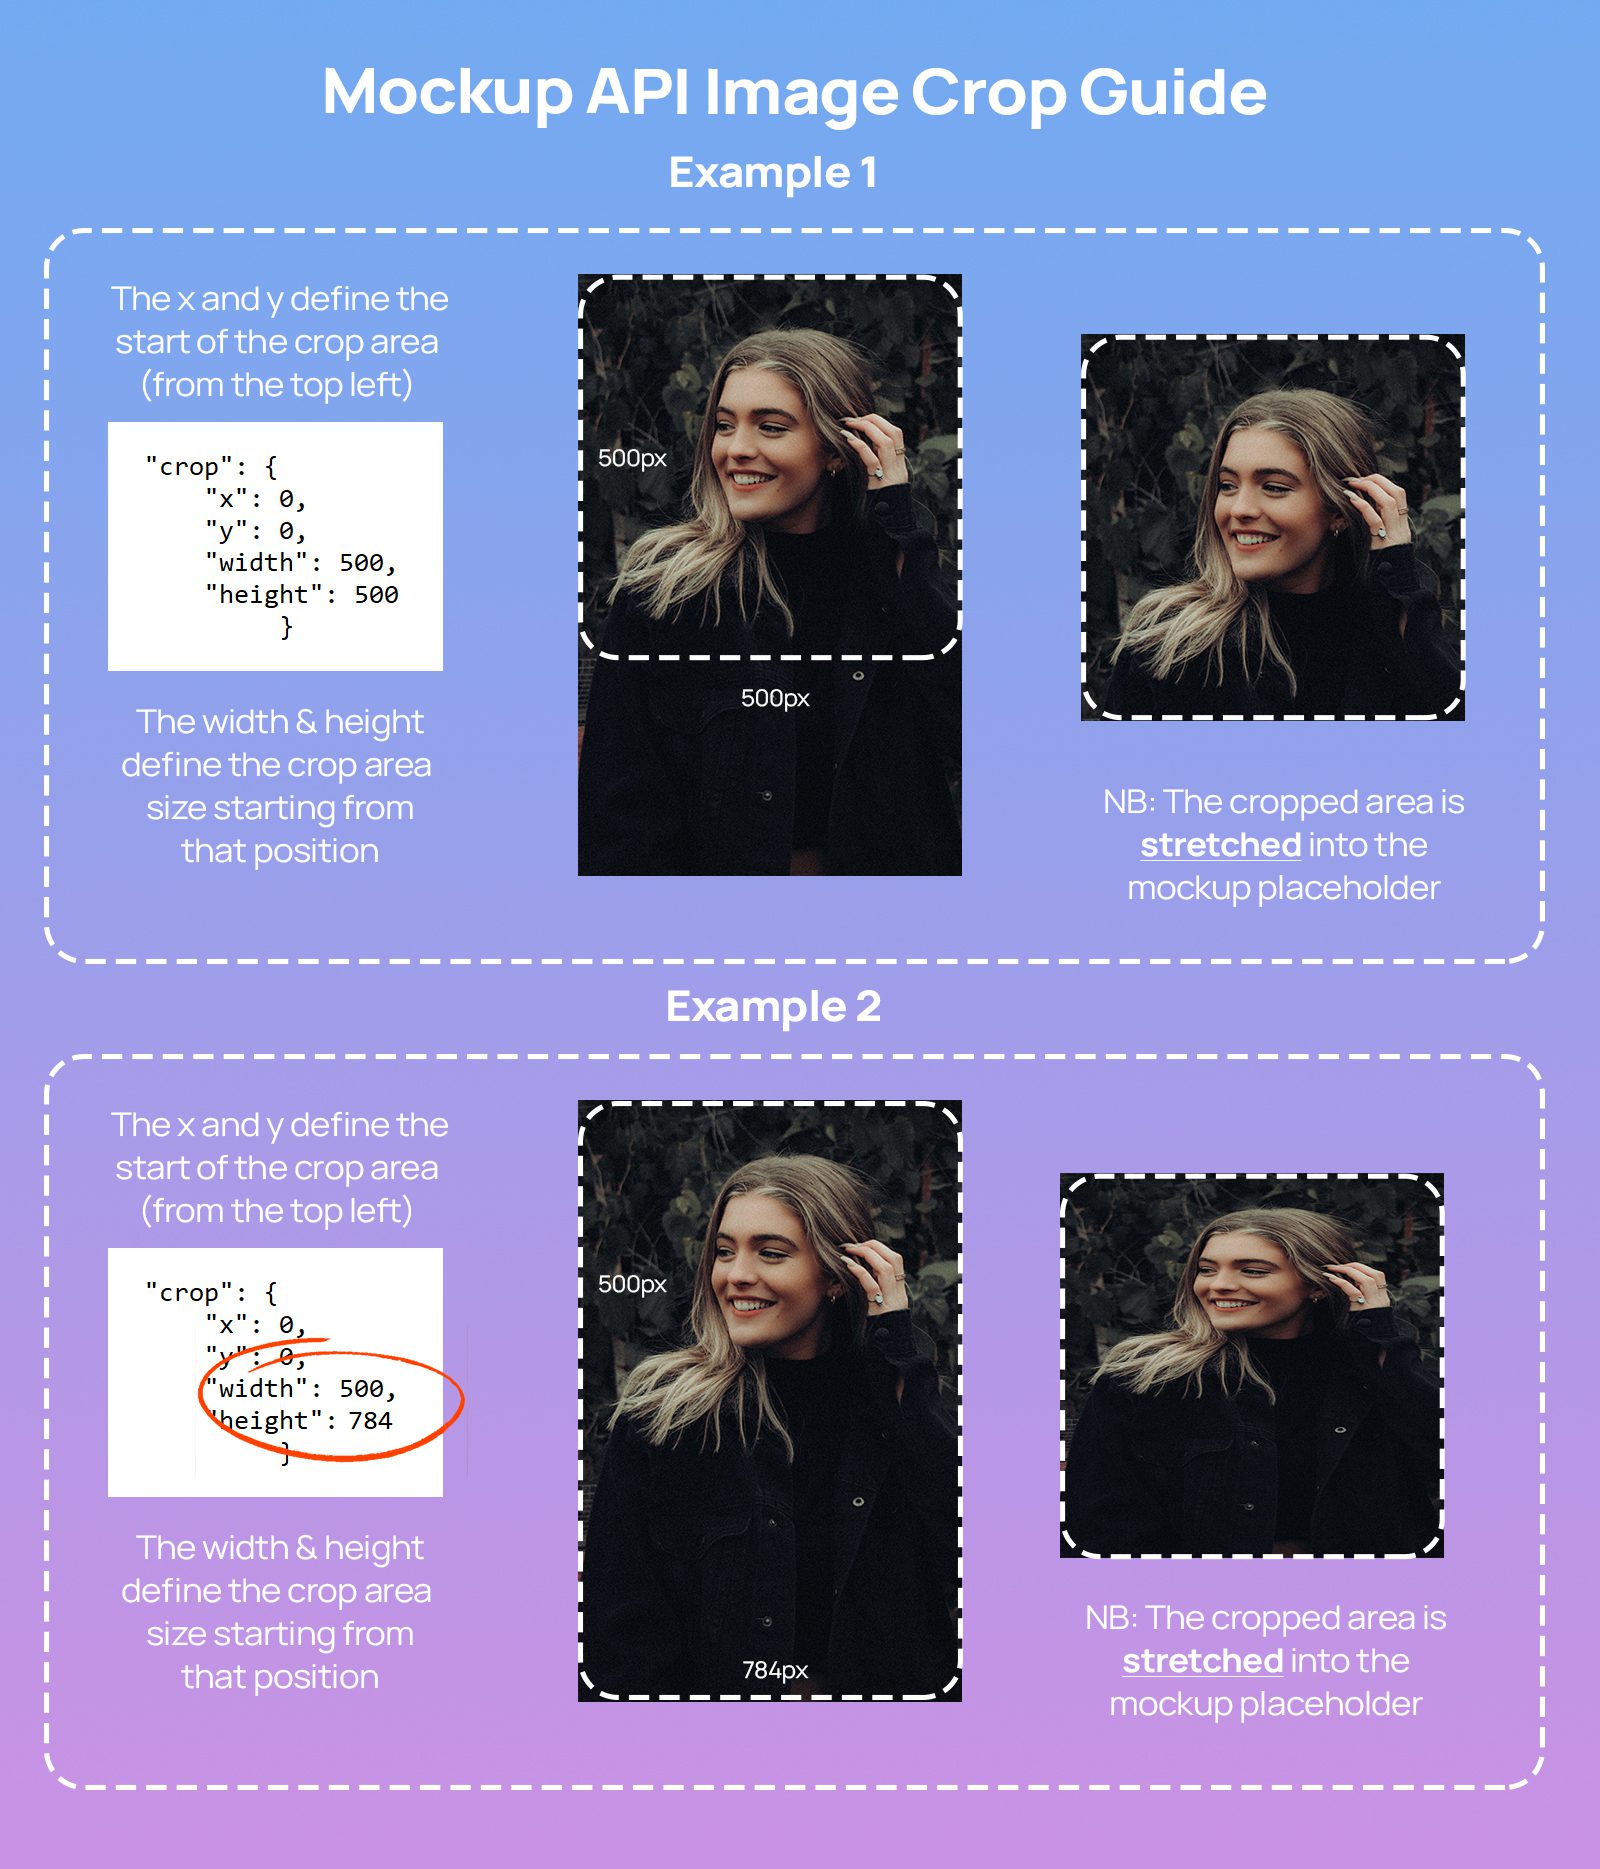
(setting the crop in Mediamodifier API means that when the print area is very wide image, but for example the mockup has a small placeholder on the mug side view, then the API must include crop info, to only insert the side of the print area onto the placeholder)
Creating the Warp Effect in Photoshop
We’ve all played around with the warp tool in Photoshop, however when the end goal is to upload the final PSD into Mediamodifier then there are quite a few limitations you must know:
- mm_wrp:NAME – all layers using warp effect, must include a prefix mm_wrp:
- Warped layers can only use the Default Photoshop warp
3. The layer also cannot be distorted, scaled or rotated, after or before it is warped (because reading warp info from a PSD file is pretty complicated ). This means it is necessary to move your to-be warped smart object layer into roughly the correct position it will be placed, then make sure it is scaled 100%, rasterized, then converted to smart object and then finally processed with the warp tool. (the layer can be moved after that, but not rotated)
Conclusion
That was it. I hope these details prove helpful when formatting your PSD files which are using warp effect, for Mediamodifier.
As always you can turn to our friendly support for more help!
Below are also the source file for this project, including 3 Photoshop PSD files with mug examples and videos showing the entire warp process.
Visualize your design Use a product mockup to showcase your design
Create your design Use our templates to create delightful designs for any medium