How to Add Animated GIF to an Image
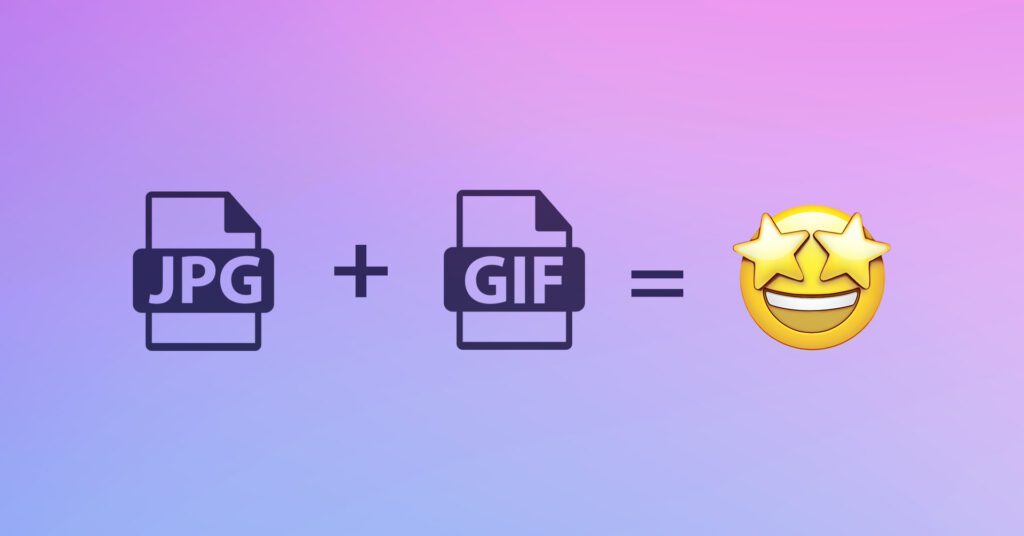
Want to know how to add GIF to images?
Marketing is all about grabbing attention and getting your message out there. Animated GIFs are an ideal way to achieve this. With the technique described below, you can turn any regular static photo into a fantastic picture with animated effects.
However, it is sometimes hard to add a GIF to a simple static image or photo, even when using the most powerful Adobe tools like Photoshop, because none of the tools are specifically made for this task.
Fortunately, there’s also a brilliantly simple way to add an animated GIF or transparent sticker to your animated flipping book or photo online by using the Mediamodifier Design Editor.
It’s just as simple as adding a sticker to your photo on social media!
Here’s how:
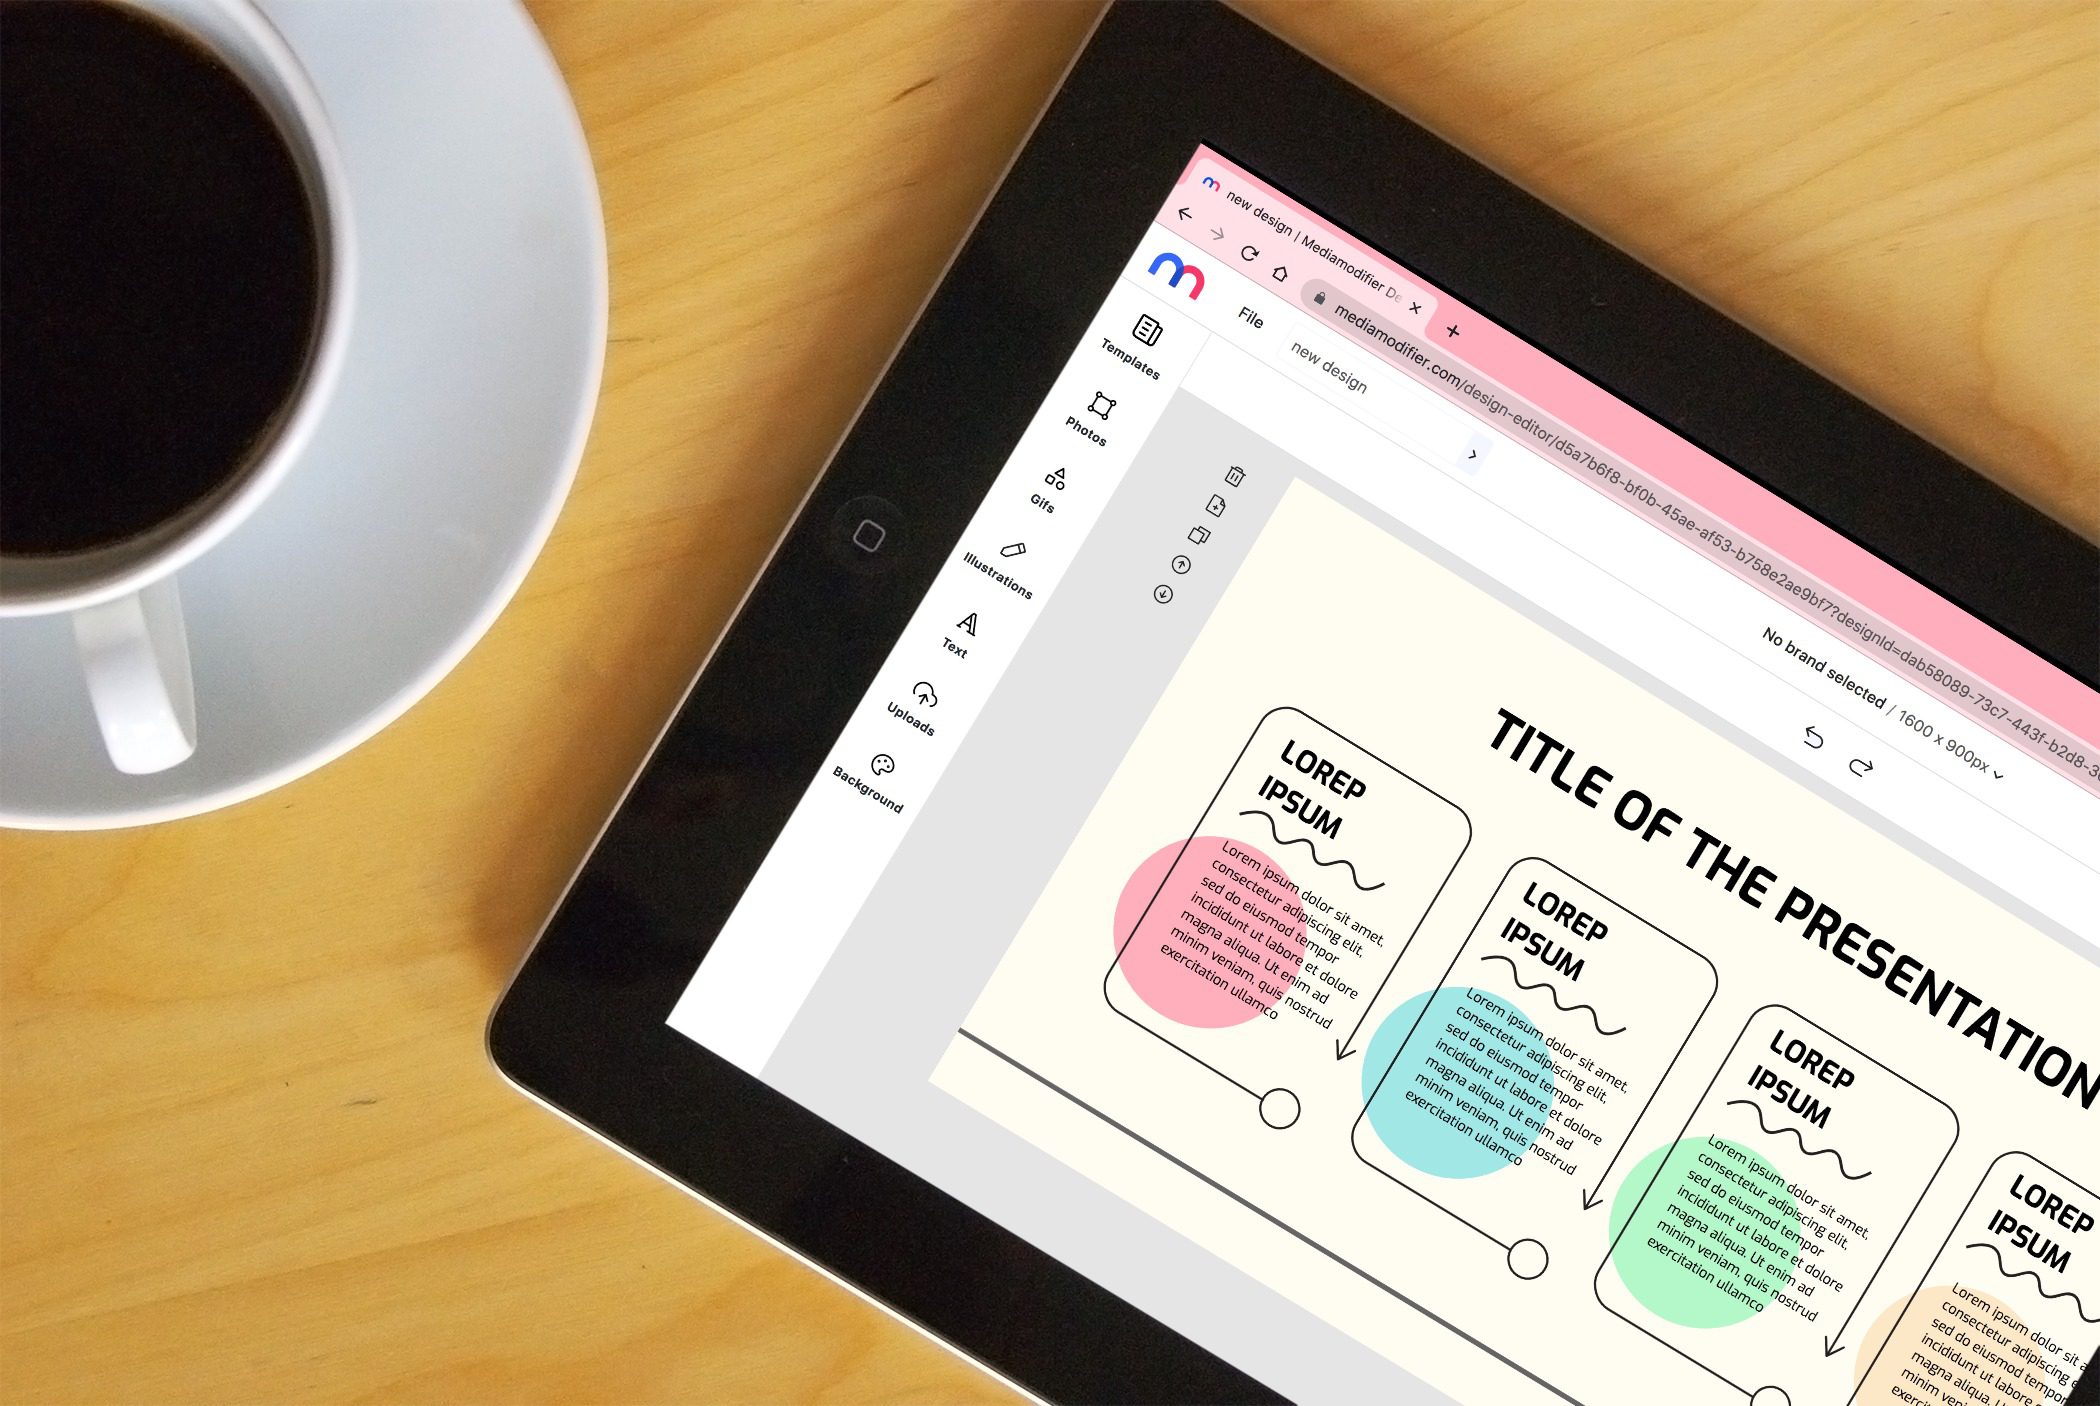
1) Open our Free GIF Editor
Create a free account and sign in at mediamodifier.com/design
Using the basic features like creating your designs, uploading images, and making GIFs are all included in the free forever account.
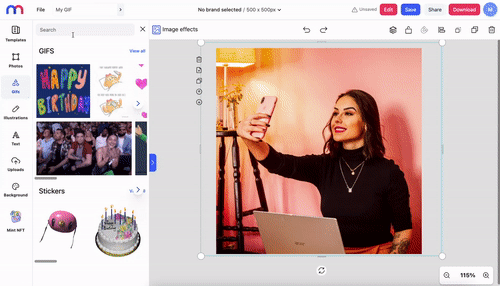
2) Upload your picture
Once you’ve signed in, simply:
- Drag and drop your image onto the canvas to upload it;
- or use the Photos tab in the sidebar to search and insert millions of high-quality and free images (provided by Unsplash)

The photos you upload (and the designs you make) will be saved to your account.
3) Choose a GIF from GIPHY
Next, click the GIF tab and use the search bar to find an animated GIF or sticker you need.
GIPHY.com provides the integration, so millions of GIFs can choose from.
Note: currently, you can’t upload your own custom GIFs.
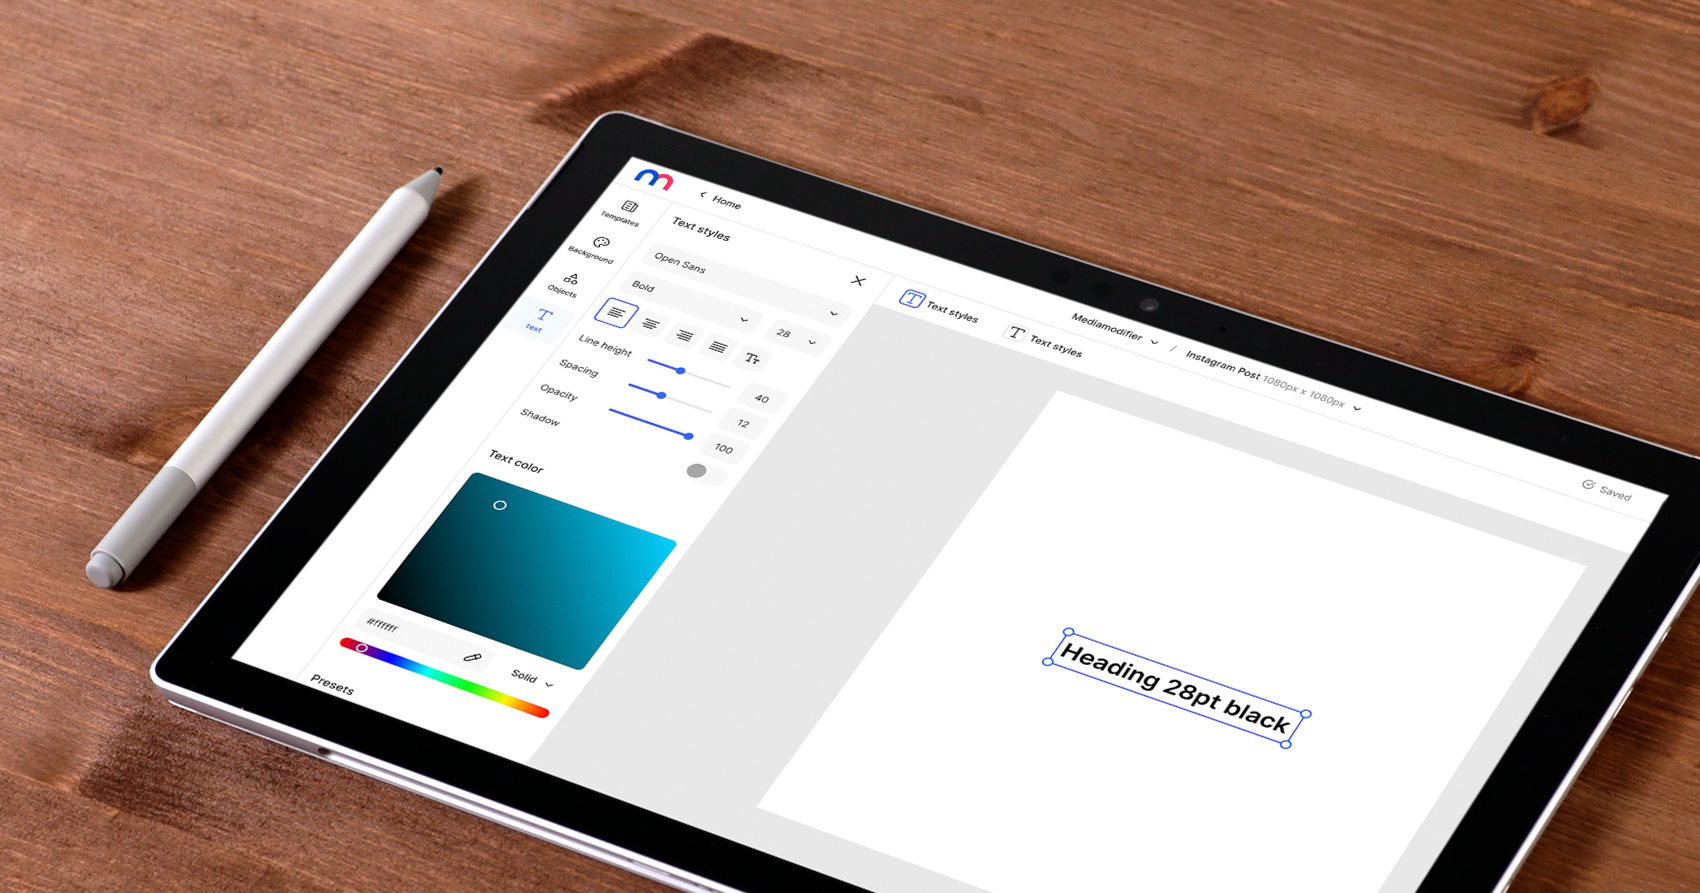
4) Move, resize and place the GIF anywhere
You can quickly move and scale the GIF and place it anywhere on the designs.
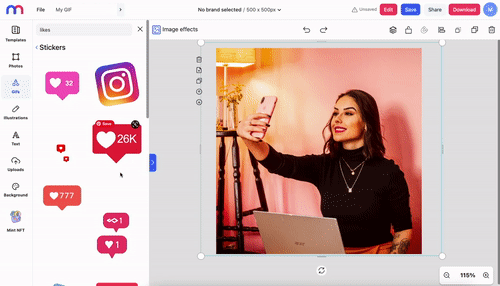
Tip: you can also send the GIF behind other objects, for example, text, by using the “Bring Forward” and “Send Backwards” commands when right-clicking on the GIF.
5) Download the picture as an animated GIF
Easy as that…
Now click the Download button and select GIF as your download option.
Depending on the size and length of your GIF, it might take a minute or less to complete, but once finished, the download will start automatically.
Hold on…

Here are some pro tips for making an animated GIF:
- Check the image size – animated GIFs might become huge because of a large photo or many frames. Make sure you set the entire canvas smaller, even before you start adding a GIF to your image.
Click on the canvas size on the top -> choose Custom size -> set a smaller size. Size around 300-500px (on the longer side) is ideal for an animated GIF:
2. Optimize your GIF – even when you made a small GIF, it’s still probably too big. Use the best GIF tool, ezGIF, to optimize it (30% is usually a great option).
The video that shows you how to add GIF to images:
That’s it
Now you know how easy it is to add animated GIF images into any static photo by using our simple design online tools.
Have fun!
Frequently Asked Questions about adding GIF into images
So, how to add a GIF to an image?
It’s simple: open Mediamodifier’s GIF Editor, upload your photo, then use the built-in GIPHY search to find the right animated sticker or GIF. Place it on your image, adjust its size and position, and download the result as a GIF file.
How do I start adding a GIF to my image using Mediamodifier?
First, sign up for an account at Mediamodifier’s platform. Then, access the GIF Editor and you’re all set to begin blending GIFs into your design.
Can I upload my own GIFs, or must I use the ones provided?
Currently, you can’t upload your own GIF files. You’ll need to choose from the vast selection available through the GIPHY-integrated search within the editor.
What steps are involved after choosing a GIF?
Once you’ve selected a GIF, simply place it on your canvas: resize, move it around, and adjust its layering using options like “Bring Forward” or “Send Backwards.” When you’re satisfied, hit “Download” and choose the GIF format to save your animated image.
What if my GIF file becomes too large after editing?
High-resolution source images or lengthy animations can result in massive file sizes—sometimes exceeding 50 MB. It’s best to resize your canvas to a more manageable dimension (around 300–500 px on the longer side) before adding your GIF.
Are there any ways to reduce the file size after downloading?
Yes, after downloading, you can use a GIF optimization tool like ezGIF—applying a reduction; for example, around 30%—to significantly shrink the file size without sacrificing much visual quality.
Related articles
Visualize your design Use a product mockup to showcase your design
Create your design Use our templates to create delightful designs for any medium